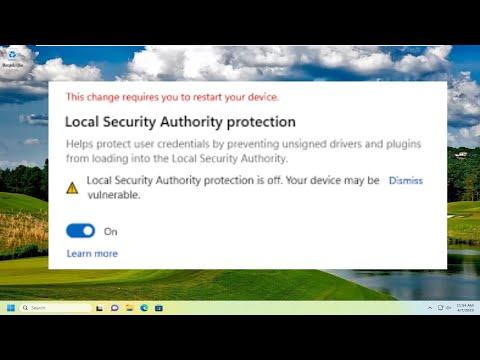
I recently encountered an issue on my Windows 11 system where the Local Security Authority (LSA) Protection was turned off. This feature is crucial for system security as it helps protect credentials and ensures that sensitive information is kept safe from unauthorized access. I decided to take matters into my own hands and fix this issue. Here’s a detailed guide on how I went about resolving it.
The first step I took was to understand what LSA Protection is and why it’s important. LSA Protection is a security feature in Windows 11 that helps protect the Local Security Authority Subsystem Service (LSASS). This service is responsible for enforcing security policies, handling login requests, and managing user authentication. When LSA Protection is enabled, it helps safeguard against credential theft and various attacks that can compromise the security of my system.
I began by checking whether LSA Protection was indeed turned off. To do this, I opened the Registry Editor. I did this by pressing `Win + R` to open the Run dialog box, typing `regedit`, and pressing Enter. In the Registry Editor, I navigated to the following path:
`HKEY_LOCAL_MACHINE\SYSTEM\CurrentControlSet\Control\Lsa`
Once there, I looked for a DWORD entry named `RunAsPPL`. If this entry was not present or set to `0`, it indicated that LSA Protection was not enabled.
The next step was to enable LSA Protection. I right-clicked in the right pane of the Registry Editor, selected `New`, and then `DWORD (32-bit) Value`. I named the new value `RunAsPPL`. After creating the value, I double-clicked on it and set its value data to `1` to enable LSA Protection. After making this change, I clicked `OK` to save it.
With LSA Protection enabled in the registry, I needed to ensure that the setting was applied correctly. I restarted my computer to make sure the changes took effect. After the reboot, I checked the Registry Editor again to verify that the `RunAsPPL` entry was still set to `1`. It was, which confirmed that the change had been applied successfully.
However, enabling LSA Protection through the registry alone might not always be enough. In some cases, I needed to ensure that my system’s Group Policy settings were configured correctly to support this feature. To do this, I opened the Group Policy Editor by pressing `Win + R`, typing `gpedit.msc`, and pressing Enter. In the Group Policy Editor, I navigated to:
`Computer Configuration -> Administrative Templates -> System -> Local Security Authority`
Here, I looked for a policy setting related to LSA Protection. Although Windows 11 does not always have a direct policy for LSA Protection, it is important to ensure that no conflicting policies are applied that could override the registry settings.
After checking the Group Policy settings, I ran a system scan to ensure that there were no underlying issues or corrupt files that might interfere with LSA Protection. I opened Command Prompt as an administrator by searching for `cmd` in the Start menu, right-clicking on it, and selecting `Run as administrator`. In the Command Prompt window, I ran the following command:
`sfc /scannow`
This command initiated the System File Checker tool, which scanned and repaired corrupted system files. Once the scan was complete and any issues were fixed, I restarted my computer again to ensure everything was properly configured.
To further enhance the security of my system, I checked for any available Windows updates. Sometimes, updates can fix issues or enhance the functionality of security features. I went to `Settings` > `Update & Security` and checked for updates. If there were any pending updates, I installed them and restarted my computer.
Lastly, I made sure that my antivirus software was up-to-date and running a full system scan. Although LSA Protection is a specific security feature, having robust antivirus protection adds an additional layer of security to my system. I ran a comprehensive scan using my antivirus software to ensure that my system was free from malware or other security threats.
By following these steps, I successfully resolved the issue with LSA Protection being turned off on my Windows 11 system. Enabling this feature was crucial for maintaining the security of my credentials and protecting my system from potential threats. Through a combination of registry edits, Group Policy checks, system scans, updates, and antivirus protection, I ensured that my system was secure and running smoothly.
In conclusion, fixing the issue of LSA Protection being off in Windows 11 involves several steps: verifying the current settings, enabling LSA Protection through the registry, checking Group Policy settings, running system scans, installing updates, and ensuring antivirus protection. By carefully following these steps, I was able to address the issue and enhance the overall security of my system.
