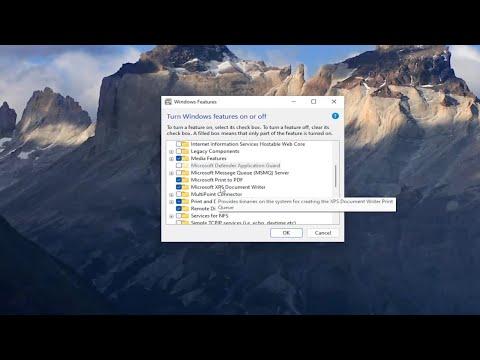
When I first encountered the issue with Microsoft XPS Document Writer not working, it felt like a typical day in the office had suddenly turned into a frustrating puzzle. The XPS Document Writer is an essential tool that functions much like a PDF writer, allowing users to save documents in the XPS format, which is useful for maintaining formatting and layout integrity across different platforms. However, when it stopped working, it was a real problem. Here’s how I tackled the issue and managed to resolve it.The first step I took was to ensure that the Microsoft XPS Document Writer was still installed and properly configured on my system. Sometimes, the problem is as simple as the driver being disabled or removed. To check this, I went to the Control Panel, selected “Devices and Printers,” and looked for the XPS Document Writer among the list of printers. If it wasn’t listed, it might be a sign that the driver was indeed missing or uninstalled.If the XPS Document Writer was not showing up, I moved on to reinstall it. I started by accessing the “Turn Windows features on or off” option from the Control Panel. In the Windows Features dialog, I looked for the “Microsoft XPS Document Writer” option. If the checkbox was unchecked, I enabled it and clicked “OK” to reinstall the component. This process also involves Windows downloading and installing any necessary files from the web, which might resolve any issues related to missing or corrupted drivers.Once I reinstalled the XPS Document Writer, I tried printing a test document. However, if the problem persisted, it was time to dig a bit deeper. I checked the Windows Print Spooler service, as issues with this service could interfere with the operation of printers, including the XPS Document Writer. To do this, I pressed Win + R, typed services.msc, and pressed Enter. In the Services window, I found “Print Spooler” and checked its status. If it wasn’t running, I started the service and set its startup type to “Automatic” to ensure it would start on boot.Next, I verified that the system was up to date with the latest Windows updates. Sometimes, issues with system components can be resolved through updates that address bugs and compatibility problems. I went to the Settings app, navigated to “Update & Security,” and clicked “Check for updates.” After installing any available updates, I rebooted the computer and tested the XPS Document Writer again.If updating Windows didn’t fix the problem, I considered checking for system file corruption. Corrupt system files can cause various issues, including problems with printers. I ran the System File Checker tool by opening Command Prompt as an administrator and typing sfc /scannow. This command scans for and attempts to repair corrupted system files. Once the scan completed and any issues were fixed, I restarted my computer and tested the XPS Document Writer once more.In cases where the XPS Document Writer still wasn’t working, I explored the possibility of a conflict with other software or drivers. I checked recently installed programs or updates that might have caused the issue. Sometimes, third-party software or updates can interfere with system components. To troubleshoot this, I used the “Clean Boot” method. I pressed Win + R, typed msconfig, and pressed Enter. In the System Configuration window, I selected the “Selective startup” option, disabled “Load startup items,” and then went to the “Services” tab, checking “Hide all Microsoft services” and clicking “Disable all.” After applying these changes, I restarted the computer and tested the XPS Document Writer.If the XPS Document Writer worked in a clean boot environment, I knew that some third-party software was causing the conflict. To identify the problematic software, I gradually re-enabled services and startup items until the issue reappeared. This process allowed me to pinpoint which software or service was causing the interference.Another step I took was to verify that my user account had the necessary permissions. Sometimes, permission issues can prevent certain functions from working correctly. I created a new user account with administrative privileges and logged in to see if the XPS Document Writer functioned properly there. If it did, it indicated that there might be a problem with the settings or configuration of my original user account.In more complex scenarios, I considered restoring the system to a previous state using System Restore. This option allows you to roll back to a point before the issue started, which can be helpful if the problem began after recent changes to the system. I accessed System Restore from the Control Panel, selected a restore point from before the issue began, and followed the prompts to restore the system.Throughout this troubleshooting process, I kept detailed notes on each step I took and the results. This record helped me keep track of what had been tried and what hadn’t, making it easier to manage the troubleshooting process and avoid repeating steps.After implementing these solutions, the XPS Document Writer was finally up and running again. Each step provided valuable insights into the nature of the issue and guided me towards resolving it. The key takeaway was that a methodical approach, coupled with patience and attention to detail, was essential in fixing the problem.
How To Fix Microsoft XPS Document Writer Not Working [Tutorial]
