I remember the first time I encountered the Windows Modules Installer 100% disk issue. It was a typical Saturday morning, and I was planning to catch up on some work while enjoying a cup of coffee. My computer, usually reliable, suddenly began acting up. It was sluggish, and every action seemed to be delayed by a significant margin. Curious, I opened Task Manager and was startled to see that the disk usage was at a constant 100%, and the process labeled “Windows Modules Installer Worker” was the culprit.
Initially, I was baffled. I had no idea what the Windows Modules Installer was or why it was consuming so many resources. As I dug deeper, I discovered that this process is responsible for installing updates and managing Windows components. However, when it gets stuck or encounters issues, it can lead to the entire disk being hogged, causing severe performance problems.
Determined to resolve the issue, I set out to find a solution. The first step I took was to understand what might be causing the problem. I learned that the Windows Modules Installer can sometimes get stuck due to several reasons, such as corrupted system files, pending updates, or issues with the Windows Update service. With this in mind, I approached the problem methodically.
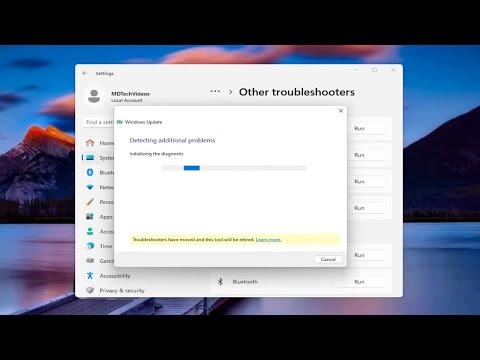
The first solution I attempted was to check for and install any pending updates manually. I went to the Settings menu, navigated to Update & Security, and clicked on Windows Update. Here, I clicked the “Check for updates” button. To my relief, Windows found some updates that needed to be installed. I let the system complete this process and hoped it would resolve the issue. Unfortunately, after the updates installed and my computer restarted, the disk usage was still stuck at 100%.
Not giving up, I decided to delve into the command line to execute a few system checks and repairs. I opened Command Prompt as an administrator by searching for “cmd” in the Start menu, right-clicking on it, and selecting “Run as administrator.” In the Command Prompt window, I first ran the System File Checker tool by typing sfc /scannow and pressing Enter. This tool scans for and attempts to repair corrupted system files. The scan took a while, and once it completed, it reported that it had found and fixed some issues.
Feeling optimistic, I restarted my computer, but the 100% disk issue persisted. I then proceeded to use another tool called DISM (Deployment Imaging Service and Management Tool). Again, in Command Prompt, I entered the following command: DISM /Online /Cleanup-Image /RestoreHealth. This command checks the health of the Windows image and attempts to repair any issues. The process was lengthy, but it completed without errors. After rebooting, the problem seemed to persist.
Realizing that the issue might be related to the Windows Update service itself, I decided to reset the Windows Update components. To do this, I followed these steps: I opened Command Prompt as an administrator once more and stopped the Windows Update services by typing the following commands, pressing Enter after each one:
arduinonet stop wuauserv net stop cryptSvc net stop bits net stop msiserver
After stopping these services, I renamed the SoftwareDistribution and Catroot2 folders, which are used by Windows Update. I did this with the following commands:
mathematicaren C:\Windows\SoftwareDistribution SoftwareDistribution.old
ren C:\Windows\System32\catroot2 Catroot2.old
I then restarted the Windows Update services with these commands:
sqlnet start wuauserv
net start cryptSvc
net start bits
net start msiserver
Following these steps, I restarted my computer once again and was relieved to see that the disk usage was no longer at 100%. The Windows Modules Installer Worker was running at a normal rate, and my computer’s performance had significantly improved.
In addition to these steps, I also decided to run a Disk Cleanup to ensure there were no unnecessary files taking up space on my drive. I did this by typing “Disk Cleanup” in the Start menu, selecting the drive I wanted to clean, and following the prompts to remove temporary files and system cache.
Another measure I took was to check for malware. Sometimes, malicious software can disguise itself as system processes or interfere with system operations. I ran a full system scan with my antivirus software to ensure that no malware was contributing to the problem.
Lastly, I considered the possibility that the issue might be related to my hard drive’s health. I used a utility called CrystalDiskInfo to check the SMART status of my hard drive. This tool gave me insights into the health and potential issues of my drive. Thankfully, my hard drive appeared to be in good condition, which ruled out hardware failure as a cause.
In the end, these combined efforts successfully resolved the Windows Modules Installer 100% disk issue. My computer returned to its usual performance level, and I could finally get back to working efficiently. The process was a bit involved, but by methodically troubleshooting and applying various fixes, I managed to overcome the issue. It was a valuable learning experience that taught me a lot about system maintenance and problem-solving.