I remember the day vividly when my usually reliable Windows 11 laptop decided to throw a wrench in my smooth workflow. I was in the middle of a crucial project, frantically transferring files from my external hard drive to my computer. It was a routine task until suddenly, out of nowhere, an error message popped up on my screen: “This device is currently in use.” Panic set in as I scrambled to understand what had gone wrong. My external drive, which had always worked flawlessly before, was now locked, preventing me from completing the transfer. I was left staring at the screen, helpless and frustrated. I knew I had to fix this issue quickly, so I delved into troubleshooting and found a solution that I want to share.
Initially, I suspected that the problem might be a simple glitch, but as I continued to get the same message despite repeated attempts to access the drive, I realized it could be something more complex. I started by closing all open applications that might be using the drive. I went through every program I had open, closing anything that might have been accessing the external drive, but the problem persisted. My next step was to check the Task Manager to see if there were any processes running that might be using the drive.
I opened Task Manager by pressing Ctrl + Shift + Esc and navigated to the “Processes” tab. I sorted the list by the “Disk” column to see if any applications were utilizing the external drive. To my dismay, there were no clear indications of any applications actively using the drive. At this point, I decided to perform a more thorough inspection. I checked the “Details” tab for processes that could be related to file access and found several background processes that might be indirectly using the drive.
I tried ending these processes one by one, but still, the issue remained unresolved. Realizing that I needed to dive deeper, I searched for solutions online. I came across various forums where users had faced similar issues, and many suggested that the problem could be related to file locks or permissions. I decided to take a closer look at the permissions of the external drive.
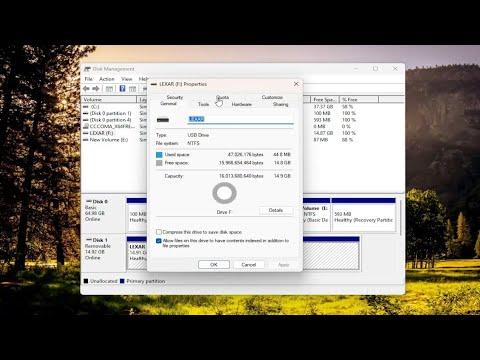
I right-clicked on the external drive icon in File Explorer and selected “Properties.” Under the “Security” tab, I reviewed the permissions for different users and groups. Everything seemed in order, but I decided to make sure that my user account had full control over the drive. I adjusted the permissions to ensure that my account had full access and applied the changes. Still, the issue persisted.
Next, I attempted a different approach by using the Command Prompt. I opened Command Prompt as an administrator and typed the command chkdsk /f X:, replacing “X” with the drive letter of my external drive. This command initiates a check for file system errors and attempts to fix them. After running the command, I was prompted to restart my computer to complete the check. I complied, hoping this would resolve the issue.
Upon rebooting, I attempted to access the external drive again. Unfortunately, the same error message greeted me. I was beginning to feel quite desperate when I stumbled upon a more advanced solution: using the Disk Management tool to reassign the drive letter. Sometimes, drive letter conflicts can cause such issues. I accessed Disk Management by right-clicking on the Start button and selecting “Disk Management.”
In the Disk Management window, I located my external drive in the list of volumes. I right-clicked on the drive and selected “Change Drive Letter and Paths.” I chose to change the drive letter to a different one, hoping this would break any potential conflicts. After applying the change, I tried accessing the drive again, but the issue was still not resolved.
Frustration was mounting, but I was determined to find a solution. I considered the possibility that there could be an issue with the USB port or cable. I tried connecting the external drive to a different USB port on my laptop and used a different cable to see if that would help. Miraculously, the error message vanished, and I was able to access my files once more.
The problem, as it turned out, was related to the USB port or cable rather than the external drive itself. It’s incredible how something as simple as a faulty connection can cause so much trouble. I was relieved and grateful that the issue had been resolved, and my files were finally accessible.
In the end, the solution involved a series of troubleshooting steps, including checking permissions, using Command Prompt, adjusting drive letters, and testing different hardware components. The issue was ultimately resolved by changing the USB port and cable, which proved to be a simple yet effective fix.
Now, whenever I encounter similar problems, I remember the lesson learned from this experience. It’s important to approach troubleshooting methodically, checking each potential issue one by one until the root cause is identified. Whether it’s a hardware problem or a software glitch, understanding the troubleshooting process can save time and reduce frustration.
So, if you ever find yourself facing the “This device is currently in use” error on Windows 11, remember to check for software processes, adjust permissions, use diagnostic tools, and test your hardware connections. With patience and persistence, you’ll likely find a solution and get back to your important work without too much hassle.
