A few months ago, I was excited to upgrade my system to Windows 11. Everything seemed to be going smoothly until I encountered a frustrating installation error: 0x800f0955 – 0x20003. The error message popped up out of nowhere during the upgrade process, and I was left staring at a screen that prevented me from completing the installation. I felt a surge of panic, as I had been eagerly waiting for the new features and improvements that came with the latest version of Windows. I decided to tackle the problem head-on.
Initially, I didn’t have a clue what the error code meant or how to resolve it. After a quick search, I discovered that this particular error often indicates a problem with system files or conflicts during the installation process. It was evident that I needed a systematic approach to troubleshoot and fix this issue. I started by gathering information and following a series of steps that could potentially solve the problem.
The first step I took was to ensure that my system was fully updated. Sometimes, pending updates or incomplete installations can interfere with new upgrades. I went to Settings > Update & Security and checked for any available updates. If there were any, I made sure to install them and restart my computer. This step seemed simple but was crucial because it ensured that my system was not missing any critical updates that could impact the installation.
Next, I decided to use the Windows Troubleshooter. This built-in tool is designed to diagnose and fix common issues related to updates and installations. I navigated to Settings > Update & Security > Troubleshoot > Additional troubleshooters, and selected the Windows Update troubleshooter. The tool scanned for problems and automatically applied fixes where possible. Although it did not solve the error immediately, it was a useful step in ruling out common issues.
Another key action was to check for corrupt system files using the System File Checker (SFC) tool. I opened Command Prompt as an administrator and entered the command sfc /scannow. This command instructed Windows to scan and repair any corrupted system files that might be causing the installation error. The process took a while, but it was reassuring to see that the tool found and repaired some issues. After the scan was complete, I restarted my computer and tried the installation again, but unfortunately, the error persisted.
I then turned to the Deployment Imaging Service and Management Tool (DISM), which is another powerful utility that can repair the Windows image and resolve more complex issues. I opened Command Prompt as an administrator once more and ran the following commands in sequence:
DISM /Online /Cleanup-Image /CheckHealthDISM /Online /Cleanup-Image /ScanHealthDISM /Online /Cleanup-Image /RestoreHealth
These commands helped in checking the health of the Windows image, scanning for corruption, and restoring it. The process was quite lengthy, but it was essential for addressing deeper issues that might not be fixed by the SFC tool alone.
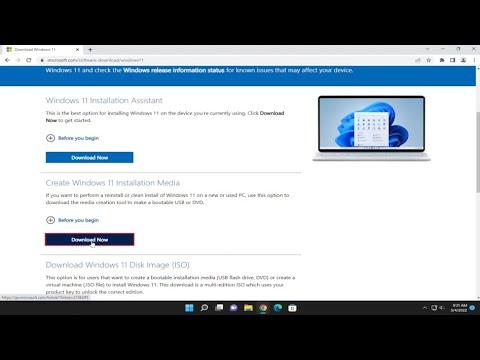
After completing the DISM commands, I once again tried to install Windows 11. This time, I decided to take a different approach by creating a bootable USB drive with the Windows 11 installation media. I downloaded the Media Creation Tool from the official Microsoft website and followed the instructions to create the bootable drive. Once the USB drive was ready, I booted my computer from it and tried to perform the upgrade from the installation environment. This method bypassed some of the potential issues with the existing system setup and provided a fresh installation attempt.
Fortunately, this approach proved successful. The installation process completed without encountering the previous error code. I was relieved and excited to finally experience Windows 11. To ensure the stability of my system, I ran several tests and checks to verify that everything was functioning correctly.
In retrospect, encountering the 0x800f0955 – 0x20003 error was undoubtedly frustrating, but it provided me with an opportunity to delve deeper into the inner workings of Windows troubleshooting. The ultimate resolution involved a combination of updating my system, using built-in troubleshooters, and leveraging advanced tools like SFC and DISM. Each step played a crucial role in resolving the issue and allowed me to successfully upgrade to Windows 11.
