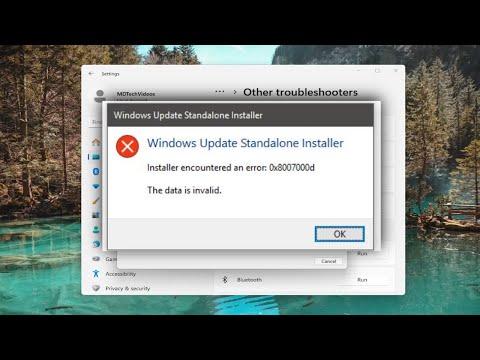
When I first encountered Windows Update Error 0x8007000d on my Windows 11 system, it was one of those frustrating moments where you feel completely stumped by technology. I had been trying to install the latest updates to enhance my system’s performance and security, but every time I tried, the update process failed with this cryptic error code. I wasn’t familiar with this specific issue, so it took me a bit of time to figure out what was going wrong and how to fix it.
Initially, I was annoyed and unsure where to start. I tried the usual solutions like restarting my computer and checking my internet connection, but the problem persisted. I then looked into what the error code 0x8007000d actually meant. After some research, I discovered that this error typically indicates a problem with the update files or corruption in the Windows Update components. With this knowledge, I realized I had to dig a bit deeper to resolve the issue.
I started by running the Windows Update Troubleshooter, a tool built into Windows that is designed to detect and fix common issues with updates. To do this, I went to Settings > System > Troubleshoot > Other troubleshooters. I clicked on “Run” next to the Windows Update troubleshooter and let it work its magic. The troubleshooter found some issues and attempted to fix them automatically, but unfortunately, the error 0x8007000d remained.
Determined to solve the problem, I decided to try a more manual approach. One common fix for Windows Update issues is to reset the Windows Update components. This involves stopping certain services, deleting temporary files, and restarting those services. I followed these steps carefully:
-
I opened Command Prompt as an administrator. To do this, I searched for “cmd” in the Start menu, right-clicked on “Command Prompt,” and selected “Run as administrator.”
-
I stopped the Windows Update services by entering the following commands one by one and pressing Enter after each:
arduinonet stop wuauserv net stop cryptSvc net stop bits net stop msiserver -
Next, I renamed the software distribution and catroot2 folders, which store temporary update files. I ran these commands:
mathematicaren C:\Windows\SoftwareDistribution SoftwareDistribution.old ren C:\Windows\System32\catroot2 Catroot2.old -
After renaming the folders, I restarted the services that I had stopped earlier by running these commands:
sqlnet start wuauserv net start cryptSvc net start bits net start msiserver -
Finally, I closed Command Prompt and tried running Windows Update again. To my relief, the updates began to download and install successfully. It seemed that the reset of the update components had cleared up the corruption or configuration issue that was causing the error.
While this solution worked for me, I also explored additional options in case the problem reappeared or if someone else encountered the same issue. Another potential fix involves using the System File Checker (SFC) and Deployment Imaging Service and Management Tool (DISM) to repair system files and restore the system image. Here’s how I ran these tools:
-
I opened Command Prompt as an administrator once more.
-
I ran the System File Checker by entering the command:
bashsfc /scannowThe SFC tool scanned my system files and repaired any issues it found. This process took some time, but it was worth it to ensure that my system files were intact.
-
After the SFC scan completed, I used DISM to repair the system image. I ran the following command:
mathematicaDISM /Online /Cleanup-Image /RestoreHealthThis command checked for and repaired any issues with the Windows image. It was another crucial step in making sure that the system was in good shape for future updates.
-
Once both scans were complete, I restarted my computer and checked Windows Update again. Thankfully, the updates continued to install without any errors.
In summary, encountering Windows Update Error 0x8007000d was a frustrating experience, but with a systematic approach, I was able to resolve it. Resetting the Windows Update components proved to be the most effective solution for me, while running SFC and DISM provided additional assurance that my system files and image were in good condition. If anyone else finds themselves in a similar predicament, I would recommend trying these solutions, as they address common causes of update errors and often lead to a successful resolution.
