I remember the day quite vividly. I had just wrapped up an intense project, and the relief of finally finishing it was palpable. I decided to reward myself with a much-needed system update to ensure my computer was running at its best. The update process seemed routine until I encountered an unexpected error: 0x80070103. The message popped up abruptly, and my excitement turned into frustration. I had heard about this particular error before but never thought I’d face it myself. It seemed like a nightmare in the middle of my relaxing moment.
Initially, I tried the usual methods to fix the issue. I restarted my computer, thinking it might be a temporary glitch. After rebooting, I attempted the update again, only to meet the same error code. It was becoming clear that this issue wasn’t going to resolve itself easily. I knew I had to dig deeper to figure out how to fix Windows Update Error 0x80070103.
The first thing I did was search online for any potential solutions. I discovered that this specific error code typically indicates a driver-related problem. Essentially, Windows was having trouble installing an update because it was encountering issues with a specific driver. This was new to me. I wasn’t familiar with driver management and how it could interfere with system updates. I decided to start with the basics and work my way up.
The first step in my troubleshooting process was to check if my drivers were up-to-date. To do this, I opened Device Manager by right-clicking on the Start button and selecting “Device Manager” from the menu. In Device Manager, I expanded the categories and checked the status of each device. I looked for any devices with a yellow exclamation mark, which would indicate a problem with the driver.
To my dismay, I found a couple of devices marked with those dreaded yellow icons. It seemed like an issue with the drivers might indeed be the culprit behind the Windows Update error. I decided to start updating these drivers manually. For each device with a problem, I right-clicked and selected “Update driver.” I then chose the option to search automatically for updated driver software. Windows searched online and attempted to find newer drivers for these devices.
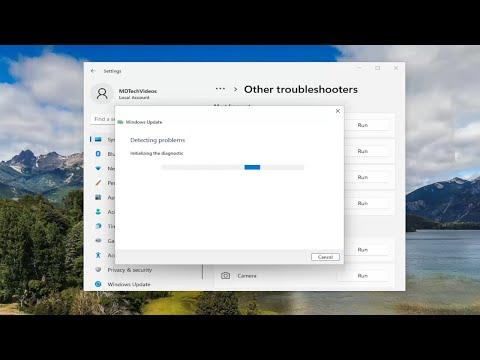
Despite this effort, the update still failed. I had to look for an alternative approach. I decided to use the Windows Update Troubleshooter. This built-in tool can automatically detect and fix common issues with Windows Update. I accessed it by going to Settings > Update & Security > Troubleshoot. Under the “Get up and running” section, I selected “Windows Update” and then clicked “Run the troubleshooter.”
The troubleshooter ran its course and detected some issues. It attempted to resolve them, and I was hopeful that this would solve the problem. After running the troubleshooter, I restarted my computer and tried the update process once again. Unfortunately, the same error code reappeared, and I felt my frustration mounting. It was clear that I needed to take a more advanced approach.
Next, I decided to reset the Windows Update components manually. This involves stopping certain services, renaming specific folders, and restarting the services. It sounded complex, but I followed a detailed guide I found online. First, I opened Command Prompt as an administrator by right-clicking on the Start button, selecting “Command Prompt (Admin),” and then confirming the prompt.
In Command Prompt, I entered several commands to stop the Windows Update services. The commands were:
arduinonet stop wuauserv net stop cryptSvc net stop bits net stop msiserver
After executing these commands, I navigated to the folders where Windows Update stores its temporary files. I renamed the SoftwareDistribution and Catroot2 folders by typing the following commands:
mathematicaren C:\Windows\SoftwareDistribution SoftwareDistribution.old
ren C:\Windows\System32\catroot2 Catroot2.old
Once these folders were renamed, I restarted the services with the following commands:
sqlnet start wuauserv
net start cryptSvc
net start bits
net start msiserver
I then tried to check for updates again. To my relief, the update process began without displaying the 0x80070103 error. The system seemed to be progressing normally this time. After a while, the updates were successfully installed, and my computer was back in working order.
Reflecting on the experience, I realized how crucial it is to keep your drivers updated and to know how to manage Windows Update issues. The process was certainly not straightforward, but understanding the steps involved helped me tackle the problem effectively. I’m now more confident in my ability to handle similar issues in the future and am relieved that my system is running smoothly once more.
In conclusion, facing Windows Update Error 0x80070103 can be frustrating, but with a bit of persistence and knowledge, it’s possible to resolve the issue. By updating drivers, using built-in troubleshooters, and manually resetting Windows Update components, I managed to overcome the problem and get my system back on track.
