It all started on a cold, rainy evening. I was sitting at my desk, engrossed in my latest project, when my computer decided it was time for a routine update. As the familiar progress bar started filling up, I was confident that this was just another minor update that would be over in no time. Little did I know, I was about to encounter a rather frustrating issue.
The update seemed to take longer than usual, so I decided to check on its progress. To my dismay, instead of seeing the usual “Update Complete” message, my screen was now displaying the error code 0x800703f9. At first, I was baffled. I tried to make sense of it by researching the error code online, only to find that many others had faced similar issues with no clear solution in sight. It appeared that this error could be triggered by a variety of reasons, from corrupted system files to issues with Windows Update components.
Determined to resolve this issue myself, I began by restarting my computer. Often, a simple reboot can fix minor glitches. However, after my PC powered back on, the error code 0x800703f9 persisted. Clearly, I needed a more systematic approach to tackle this problem.
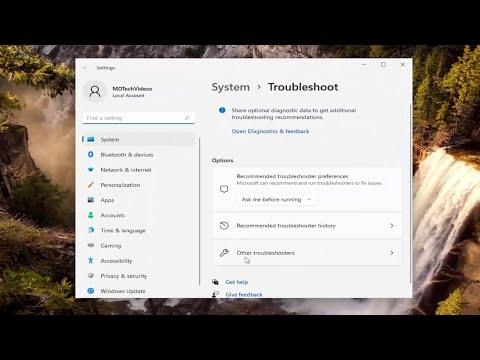
The next step in my troubleshooting process was to run the Windows Update Troubleshooter. I navigated to the Settings app, selected “Update & Security,” and then clicked on “Troubleshoot.” From there, I selected “Windows Update” and ran the troubleshooter. The tool scanned my system for issues and attempted to fix them automatically. Although it found and attempted to resolve some problems, the error code remained.
Undeterred, I proceeded to check the integrity of system files using the System File Checker (SFC) tool. I opened the Command Prompt as an administrator by searching for “cmd” in the Start menu, right-clicking on it, and choosing “Run as administrator.” In the Command Prompt window, I typed the command sfc /scannow and pressed Enter. The tool began scanning for corrupted system files and automatically replaced any damaged ones it found. This process took some time, but once it was finished, I restarted my computer to see if the issue was resolved. Unfortunately, the error code 0x800703f9 was still present.
Next, I decided to use the Deployment Imaging Service and Management Tool (DISM). This tool is another utility for fixing Windows system image problems. Again, I opened Command Prompt as an administrator and typed the following commands one by one:
DISM /Online /Cleanup-Image /CheckHealthDISM /Online /Cleanup-Image /ScanHealthDISM /Online /Cleanup-Image /RestoreHealth
Each command performed a different function: checking the health of the Windows image, scanning for corruption, and restoring the system image to a healthy state. The DISM tool took a while to complete, but once it finished, I rebooted my computer and attempted the update again. Sadly, the same error code reappeared.
By this point, I was starting to feel a bit frustrated, but I was determined to find a solution. I decided to manually reset the Windows Update components. This process involves stopping certain services, renaming specific folders, and then restarting the services. Here’s how I did it:
I opened Command Prompt as an administrator once more and stopped the Windows Update services by entering these commands:
net stop wuauservnet stop cryptSvcnet stop bitsnet stop msiserver
Next, I renamed the SoftwareDistribution and Catroot2 folders, which are used by Windows Update to store temporary files. To do this, I used the following commands:
ren C:\Windows\SoftwareDistribution SoftwareDistribution.oldren C:\Windows\System32\catroot2 Catroot2.old
After renaming these folders, I restarted the services with the following commands:
net start wuauservnet start cryptSvcnet start bitsnet start msiserver
Finally, I attempted to run the update again. To my relief, this time the update completed successfully without any error codes. It seemed that resetting the Windows Update components had resolved the issue.
Looking back, I felt a mix of relief and accomplishment. Resolving the error code 0x800703f9 required a combination of patience and methodical troubleshooting. Each step, from running the Windows Update Troubleshooter to manually resetting update components, was essential in diagnosing and fixing the problem.
If you ever find yourself facing a similar issue with Windows Update, I hope my experience serves as a helpful guide. Sometimes, it takes a bit of persistence and a systematic approach to overcome these technical hiccups.