I was working on a crucial project when my Windows Update decided to act up. The error 0x800f0905 kept popping up, and I was at a loss for how to fix it. I tried several methods to resolve the issue, but nothing seemed to work. Here’s how I ultimately managed to solve the problem and get my system back on track.
First, I started by understanding the error. Error 0x800f0905 usually appears when there is a problem with the update installation or when the update components are corrupted. This error can be quite frustrating, especially if you’re in the middle of an important task. I knew that to fix it, I’d need to delve into a few troubleshooting steps.
My first step was to ensure that my system was up to date. I checked for updates manually by going to Settings > Update & Security > Windows Update and then clicked on “Check for updates.” Even though it seemed like an obvious step, it’s always worth checking. Sometimes the issue could be resolved with a simple update.
When that didn’t work, I moved on to the next step: running the Windows Update Troubleshooter. This tool can automatically detect and fix some problems with Windows Update. To run it, I went to Settings > Update & Security > Troubleshoot > Additional troubleshooters, and then selected “Windows Update” and clicked “Run the troubleshooter.” The tool found some issues and attempted to fix them, but unfortunately, the error persisted.
Next, I decided to use the Command Prompt to reset the Windows Update components. This is a more advanced method, but it’s quite effective. I opened Command Prompt as an administrator by searching for “cmd” in the Start menu, right-clicking on it, and selecting “Run as administrator.” In the Command Prompt window, I typed the following commands one by one, pressing Enter after each:
arduinonet stop wuauserv net stop cryptSvc net stop bits net stop msiserver ren C:\Windows\SoftwareDistribution SoftwareDistribution.old ren C:\Windows\System32\catroot2 Catroot2.old net start wuauserv net start cryptSvc net start bits net start msiserver
These commands stop the Windows Update services, rename the SoftwareDistribution and Catroot2 folders (which store update files and configuration data), and then restart the services. This process helps reset the update components and often resolves many update-related issues.
Even after performing these steps, I found that the error was still there. I then decided to check the Windows Update history to see if there was any specific update causing the problem. I went to Settings > Update & Security > Windows Update > View update history. Here, I could see a list of recent updates and their statuses. I noticed that a specific update had failed multiple times.
To address this, I decided to uninstall and reinstall the problematic update. I went to Settings > Update & Security > Windows Update > View update history > Uninstall updates. I found the problematic update in the list, selected it, and clicked “Uninstall.” After uninstalling, I restarted my computer and went back to Windows Update to check for updates again. I reinstalled the updates and hoped that this would solve the issue.
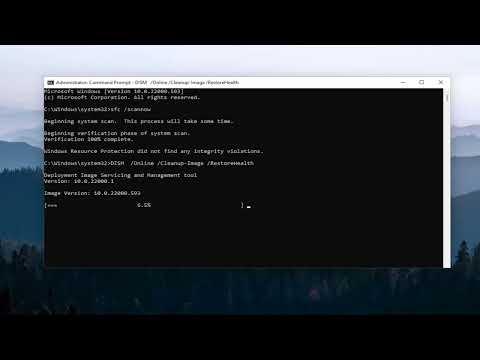
Another approach I took was to use the System File Checker (SFC) tool. Corrupt system files can sometimes cause update errors, so I ran an SFC scan to check for and repair any issues. I opened Command Prompt as an administrator again and typed:
bashsfc /scannow
This command scans the integrity of system files and attempts to fix any corruption. The process took some time, but it reported finding and fixing errors. After completing the scan, I restarted my computer and tried updating again.
If none of these steps worked, I considered using the Deployment Imaging Service and Management Tool (DISM) to repair the Windows image. I opened Command Prompt as an administrator and ran the following commands:
mathematicaDISM /Online /Cleanup-Image /RestoreHealth
This command checks the health of the Windows image and attempts to fix any issues. After the scan completed, I restarted my computer and tried the update process once more.
Finally, if all else fails, I thought about performing a repair install of Windows 10. This involves reinstalling Windows while keeping your files and applications. I downloaded the Windows 10 Installation Media from Microsoft’s website and followed the instructions for a repair install. This process is a bit more involved and should be considered a last resort, but it’s effective in fixing stubborn issues.
By systematically going through these troubleshooting steps, I was able to resolve the Windows Update error 0x800f0905. It took a bit of patience and persistence, but eventually, my system was back to normal, and I could continue working without further interruptions. If you find yourself facing a similar issue, I hope these steps help you fix the problem as they did for me.
