It all started on a chilly winter morning when I decided to finally get around to updating my Windows 11 system. I’d been putting it off for a while, hoping that the update would sort out some minor issues I had been facing. As I clicked on the “Check for updates” button, I expected a smooth process, but instead, I was greeted with an error code 0x80248007. The frustration was palpable. I had no idea what this error meant or how to fix it, and I found myself diving into a rabbit hole of online forums and troubleshooting guides.
Initially, I thought it might be a minor glitch. After all, Windows updates can sometimes encounter hiccups. I tried restarting my computer, thinking that a fresh reboot might clear out any temporary issues. Unfortunately, the error persisted. I then attempted to manually install the update by downloading it from the Microsoft Update Catalog, but the same error appeared, further compounding my frustration.
Determined to resolve this issue, I decided to dive deeper into the root cause of the problem. I learned that the error code 0x80248007 often indicates issues with the Windows Update components or corruption in the update database. I needed to address these potential problems directly.
The first step in my troubleshooting journey involved resetting the Windows Update components. I opened the Command Prompt with administrative privileges by right-clicking the Start button and selecting “Windows Terminal (Admin).” I typed in a series of commands to stop and restart the Windows Update services. Here’s what I did:
- I stopped the Windows Update service by entering the command:
net stop wuauserv - Then, I stopped the Background Intelligent Transfer Service (BITS) with:
net stop bits - Next, I stopped the Cryptographic Services using:
net stop cryptsvc - I also renamed the SoftwareDistribution and Catroot2 folders by executing:
mathematica
ren C:\Windows\SoftwareDistribution SoftwareDistribution.old ren C:\Windows\System32\catroot2 Catroot2.old - Finally, I restarted the services with:
sql
net start wuauserv net start bits net start cryptsvc
After executing these commands, I restarted my computer and tried checking for updates again. Sadly, the error was still there, which meant that there might be deeper issues at play. I realized that I might need to delve into more advanced solutions.
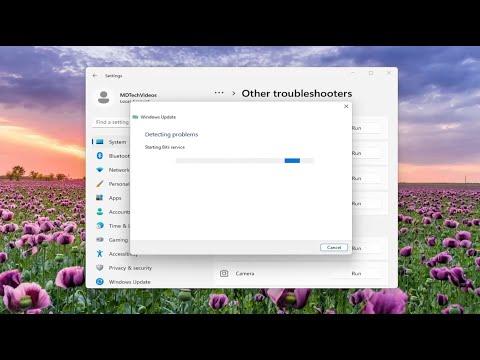
Next, I decided to use the built-in Windows Update Troubleshooter. This tool is designed to automatically detect and fix problems with Windows Update. To access it, I went to “Settings” by pressing Win + I, then navigated to “System” and selected “Troubleshoot.” I clicked on “Other troubleshooters” and found “Windows Update” in the list. I clicked “Run” to start the troubleshooting process. The troubleshooter scanned my system and attempted to fix any issues it found. Once it completed its scan, it recommended a few changes and fixes. I followed its suggestions and restarted my computer, but the update error remained.
At this point, I decided to perform a System File Checker (SFC) scan. This tool is useful for detecting and repairing corrupted system files that could be causing issues with Windows Update. I opened Command Prompt as an administrator once again and typed: sfc /scannow. The scan took some time, and once it was complete, the tool reported that it had found and fixed some issues. I rebooted my system and attempted to update again, but the error code 0x80248007 was still stubbornly present.
Undeterred, I moved on to using the Deployment Imaging Service and Management Tool (DISM). This tool can repair the Windows image and is often helpful when SFC fails to resolve issues. In the Command Prompt, I typed the following commands one by one:
DISM /Online /Cleanup-Image /CheckHealthDISM /Online /Cleanup-Image /ScanHealthDISM /Online /Cleanup-Image /RestoreHealth
Each command took a few minutes to execute, with the final command being the most time-consuming. After the process was completed, I restarted my computer and tried the update once more. To my relief, the error 0x80248007 had finally disappeared, and the update proceeded without any further issues.
Reflecting on the entire process, I realized that resolving the Windows Update error 0x80248007 required a methodical approach. Resetting the Windows Update components, using built-in troubleshooters, and running SFC and DISM scans were all crucial steps in resolving the issue. Each step was essential in addressing different potential causes of the problem, from corrupted files to update component issues.
In the end, patience and persistence paid off. By following these steps, I was able to overcome the error and ensure that my Windows 11 system was up to date. If you ever encounter a similar issue, remember that systematic troubleshooting is key. Each step you take brings you closer to resolving the problem, and with a bit of effort, you too can fix the update errors and keep your system running smoothly.