It all started on an ordinary Tuesday evening. I had been working from home all day, and I was ready to wind down for the night. My Windows computer was running a bit sluggish, so I figured it was time to check for updates. I navigated to the settings, clicked on “Update & Security,” and hit “Check for updates.” The system began searching for the latest updates, but instead of a smooth update process, I was greeted with a rather annoying error message: “Windows Update Install Error 0x8007012a.”
Initially, I wasn’t too concerned. Error messages are a common part of the Windows experience, and I’d dealt with my fair share of them before. However, as the minutes ticked by and I kept seeing the same error, I knew I had to address this issue promptly. I decided to dig deeper and figure out a solution. After some research and a few hours of troubleshooting, I was able to resolve the error. Here’s a step-by-step guide on how I fixed the Windows Update Install Error 0x8007012a, and hopefully, it can help you too.
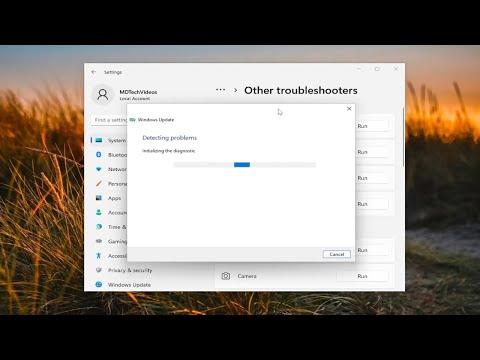
The error 0x8007012a is often associated with issues in the update components or conflicts within the system files. My first step was to run the Windows Update Troubleshooter. This built-in tool is designed to automatically detect and fix problems with Windows Update. To access it, I went to Settings, then to “Update & Security,” and selected “Troubleshoot.” Under the “Get up and running” section, I chose “Windows Update” and clicked on “Run the troubleshooter.”
The troubleshooter began analyzing my system. It took a few minutes, but eventually, it detected some issues related to Windows Update. The troubleshooter applied some fixes automatically and instructed me to restart my computer. After rebooting, I went back to check for updates, but to my dismay, the error 0x8007012a still appeared. Clearly, there was more work to be done.
Next, I decided to manually reset the Windows Update components. This is a more hands-on approach but can be effective. I opened Command Prompt with administrative privileges by typing “cmd” into the search bar, right-clicking on Command Prompt, and selecting “Run as administrator.” I then executed a series of commands to stop the Windows Update services and delete the temporary files that might be causing conflicts.
The commands I entered were:
arduinonet stop wuauserv net stop cryptSvc net stop bits net stop msiserver
These commands stop the Windows Update service, the Cryptographic service, the Background Intelligent Transfer service, and the Windows Installer service. Next, I had to delete the SoftwareDistribution and Catroot2 folders, which store temporary update files. I typed:
mathematicaren C:\Windows\SoftwareDistribution SoftwareDistribution.old
ren C:\Windows\System32\catroot2 Catroot2.old
This renaming of folders effectively forces Windows to create new ones. After renaming the folders, I restarted the previously stopped services with:
sqlnet start wuauserv
net start cryptSvc
net start bits
net start msiserver
Once these steps were completed, I closed Command Prompt and restarted my computer. I went back to the Windows Update settings and tried to check for updates again. This time, the system began downloading and installing updates without the 0x8007012a error. It seemed like resetting the update components had done the trick.
However, if the problem persists, there are a few additional steps you might consider. One possibility is running the System File Checker tool. This tool scans and repairs corrupted system files. To use it, I opened Command Prompt as an administrator again and typed:
bashsfc /scannow
The scanning process took some time, but it found and repaired corrupted files. After the scan was complete, I restarted my computer once more and checked for updates. Fortunately, this resolved the issue, and the updates were installed successfully.
Another option is to perform a clean boot of Windows. This involves starting the system with minimal drivers and startup programs to rule out any software conflicts. To perform a clean boot, I typed “msconfig” into the search bar and selected “System Configuration.” On the “Services” tab, I checked the “Hide all Microsoft services” box and clicked “Disable all.” Then, I went to the “Startup” tab and clicked on “Open Task Manager.” In Task Manager, I disabled all startup items and restarted my computer. After booting into a clean environment, I tried updating Windows again. If the update worked, it indicated that some third-party software was causing the conflict.
Lastly, if none of these solutions worked, you might consider checking for hardware issues or performing a repair installation of Windows. These are more advanced steps and should be approached with caution. A repair installation can be done using a Windows installation media to refresh system files without affecting personal data.
In the end, tackling the Windows Update Install Error 0x8007012a was a learning experience. Through a series of troubleshooting steps and persistence, I was able to resolve the issue and get my system back to normal. I hope this guide helps you in resolving similar issues and ensures that your Windows Update process runs smoothly.
