It was a typical Tuesday morning when I found myself grappling with a dilemma I hadn’t anticipated. I was working on a collaborative project for work that involved drafting a comprehensive report in Google Docs. As I was finalizing the document, I realized it needed visual elements to better convey the data and ideas I was presenting. I had several images that would complement the text perfectly, but I had never inserted images into Google Docs before. I quickly found myself in a bit of a panic, wondering how to integrate these visuals seamlessly into the document without disrupting its formatting.
My first instinct was to dive into the Google Docs help center, hoping to find a straightforward guide on how to insert images. To my surprise, the official help pages were a bit sparse, and I didn’t find a detailed step-by-step guide that I was looking for. I decided to tackle the problem on my own, using a combination of online research and trial and error.
The first thing I did was open the Google Docs document where I wanted to insert the images. My goal was to place the images in specific spots within the text, ensuring they were aligned properly with the surrounding content. To begin, I clicked on the spot in the document where I wanted the image to appear. This was a crucial step because the placement of the cursor would determine where the image would be inserted.
Next, I navigated to the menu at the top of the screen and clicked on “Insert.” A drop-down menu appeared with various options, including “Image.” Clicking on this option presented several choices for adding images. I could upload an image from my computer, use a URL to insert an image from the web, or choose from images stored in my Google Drive. I decided to start by uploading an image from my computer, as it was the most straightforward method for my needs.
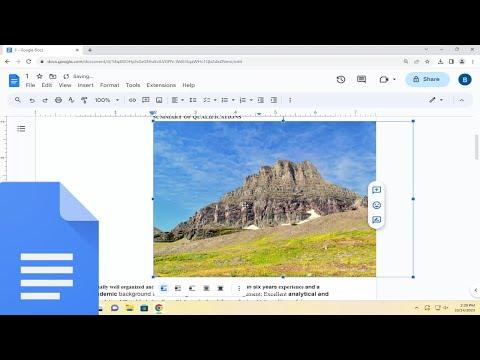
After selecting “Upload from computer,” a file explorer window opened, allowing me to browse through my files. I located the image I wanted to insert, selected it, and clicked “Open.” The image began to upload, and within a few seconds, it appeared in my Google Docs document at the cursor location. It was a relief to see the image appear, but I quickly realized that it needed some adjustments to fit well within the text.
To resize the image, I clicked on it, and small blue squares appeared around its edges. By clicking and dragging these squares, I could adjust the image’s size. I experimented with different sizes until the image fit neatly within the document’s layout. I also noticed that I could move the image around by clicking and dragging it to the desired position. This feature was incredibly useful for aligning the image with specific sections of the text.
One of the features I found particularly handy was the image formatting options available when I clicked on the image. A toolbar appeared, offering various options such as “Wrap text,” “Break text,” and “In line.” I chose “Wrap text” because I wanted the text to flow around the image rather than having it appear on a separate line. This option allowed me to integrate the image more naturally into the content, making the document look more polished and professional.
As I continued working on the document, I needed to insert more images. The process became more intuitive with each insertion. For images that were available online, I used the “Search the web” option under the “Insert” menu. This allowed me to search for images directly from Google within the Google Docs interface. Once I found an appropriate image, I clicked on it and selected “Insert” to add it to the document. This method was incredibly convenient, especially when I needed to quickly find relevant visuals without leaving the document.
I also explored the option to add images from my Google Drive. By choosing “Drive” from the “Insert” menu, I could browse through my Drive’s folders and select images that I had previously uploaded or shared. This was particularly useful for accessing images that were part of shared project folders or that I had organized for specific purposes.
Throughout this process, I discovered that the alignment and placement of images could be further refined by adjusting the margins and spacing. By clicking on the image and then selecting the “Image options” from the toolbar, I could fine-tune the image’s position and adjust its spacing relative to the text. This level of control allowed me to create a well-organized and visually appealing document.
In summary, inserting images into Google Docs turned out to be a straightforward process once I got the hang of it. By using the “Insert” menu and experimenting with different formatting options, I was able to seamlessly integrate images into my document. Whether uploading from my computer, searching online, or selecting from Google Drive, each method offered its own advantages and suited different needs. With these techniques, I was able to enhance my document with visual elements, making it more engaging and effective for my audience.
