I had always considered myself fairly proficient with Microsoft Word. After all, I used it regularly for work, school, and personal projects. However, recently I encountered an issue that left me quite frustrated: how to insert page breaks effectively. It seemed like a simple task, yet I found myself struggling to understand the best approach to achieve the desired layout for my document.
It all started when I was working on a comprehensive report for a client. The document needed to be well-organized and clearly divided into sections for easier reading. I wanted each section to begin on a new page, which, I assumed, was straightforward with the use of page breaks. However, as I began to insert them, I realized that the process was not as intuitive as I had expected. The formatting seemed to get messy, and my document didn’t look as polished as I had hoped.
Initially, I tried inserting breaks by pressing the “Enter” key repeatedly, but this method was not only tedious but also unreliable. Sometimes, the text would shift unexpectedly when I made changes to the document, and I would find myself having to adjust the breaks constantly. This approach was frustrating and inefficient, so I decided to delve deeper into the proper way to use page breaks.
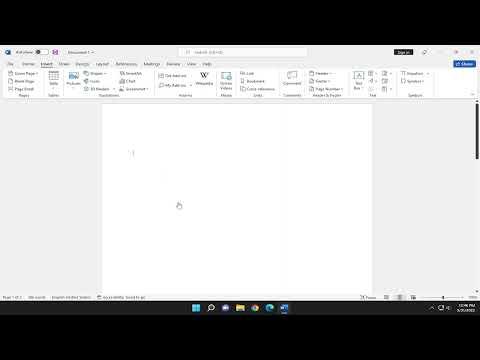
I started by exploring the options available in Microsoft Word’s Ribbon. The first step I took was to go to the “Insert” tab, which is where I discovered the “Page Break” button. Clicking this button seemed like the ultimate solution to my problem, but I wanted to ensure I fully understood how to use it effectively. I learned that by placing the cursor where I wanted the new page to start and then clicking “Page Break,” Word would create a clear and defined separation, pushing the following content to the next page.
One of the challenges I faced was understanding when to use page breaks versus section breaks. I learned that page breaks are ideal for simple document divisions, whereas section breaks are more suited for documents with varied formatting needs. For instance, if you need different headers or footers in different parts of your document, section breaks are the way to go. However, for my report, page breaks were sufficient.
I practiced inserting page breaks in various parts of my document to see how they affected the layout. I found that placing the cursor at the beginning of a new section and pressing “Page Break” would shift the text following the cursor to a new page. This method was straightforward and allowed me to create a clean and organized report.
Another useful feature I discovered was the ability to view page breaks in the “Draft” view. Switching to this view helped me see where each page break was located, making it easier to adjust and troubleshoot any issues with my document layout. To switch views, I went to the “View” tab and selected “Draft.” This change provided a clearer perspective on how my document was structured.
I also learned about the “Layout” tab, which offers additional options for managing page breaks and overall document formatting. Here, I found settings related to margins, page orientation, and size that helped me ensure my document adhered to professional standards. Adjusting these settings was crucial for creating a polished final report.
As I continued working on the report, I noticed that sometimes inserting a page break would create unwanted blank spaces or cause text to overlap. To address this, I became more familiar with the “Show/Hide” button in the “Home” tab, which reveals formatting marks such as paragraph symbols and page breaks. This feature was incredibly helpful in identifying and fixing layout issues.
Finally, I realized that while page breaks are a fundamental tool, combining them with other formatting features like headers, footers, and styles can enhance the overall appearance of a document. For my report, I ensured that each section had a clear and consistent format, including appropriate headers and footers, which contributed to a professional and cohesive look.
In conclusion, mastering the use of page breaks in Microsoft Word significantly improved my document formatting skills. By learning to use the “Page Break” button effectively, understanding the difference between page and section breaks, and utilizing various view options, I was able to create a well-organized and polished report. This experience not only resolved the issue I was facing but also enhanced my overall proficiency with Microsoft Word.
