I had been using Facebook Messenger on my smartphone for years, and it had become an essential part of my daily communication. However, recently, I realized that I needed to access Messenger more conveniently while working on my PC, so I decided to install it on my Windows 11 laptop. It seemed straightforward, but I ran into a few issues along the way that made the process a bit more challenging than expected.
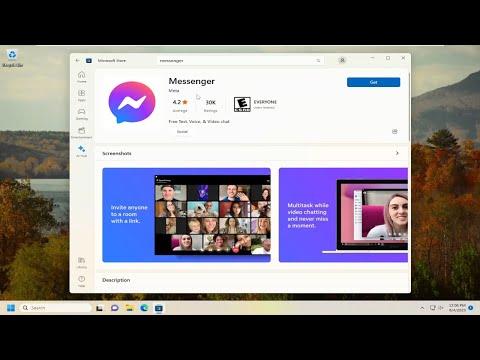
Initially, I assumed that I could simply download Messenger from the Microsoft Store and get it up and running in no time. However, when I searched for Messenger in the store, I was surprised to find that it wasn’t available there. This led me to explore alternative methods for installation. My first thought was to check the official Facebook website for any hints or recommendations on how to get Messenger on a Windows 11 PC.
I found that Facebook’s official guidance pointed towards using Messenger through a web browser. This approach was fine but didn’t offer the same seamless experience as a dedicated app. I wanted the full app experience with notifications and a more integrated interface. After a bit more digging, I discovered that Facebook Messenger could be installed as a Progressive Web App (PWA). This method intrigued me because it combined the convenience of an app with the accessibility of the web.
To start, I opened Microsoft Edge, which is the default browser on Windows 11 and supports the installation of PWAs. I navigated to the Messenger website, where I was greeted with the familiar chat interface. To install Messenger as a PWA, I clicked on the three-dot menu in the upper-right corner of the browser window, then selected ‘Apps’ and ‘Install Messenger’. A pop-up appeared, prompting me to confirm the installation. Once I clicked ‘Install’, Messenger was added to my Start menu and taskbar, just like a traditional app.
The installation was relatively smooth, but I faced a few challenges. For one, the app icon didn’t immediately show up on my taskbar, even though it was pinned to the Start menu. I had to manually pin it to the taskbar by right-clicking on the app icon in the Start menu and selecting ‘Pin to taskbar’. Another minor issue was adjusting the notification settings to ensure that I received alerts for new messages. I had to go into the Windows settings and configure notification preferences to make sure they were properly set up for Messenger.
Once these tweaks were done, I was pleased with the result. The Messenger PWA provided a near-native app experience, complete with notifications and an easily accessible interface. I could now use Messenger directly from my PC, and it felt like a natural extension of my daily workflow. The transition from the smartphone app to the PWA was smooth, and I appreciated the convenience of managing my chats from a larger screen.
In conclusion, while the process of installing Facebook Messenger on Windows 11 wasn’t as straightforward as I initially thought, using the Progressive Web App approach provided a satisfactory solution. It combined the benefits of both web and app experiences, making it easier to stay connected through Messenger on my PC. If you’re facing similar issues or looking for a way to integrate Messenger into your Windows 11 setup, I highly recommend trying out the PWA method.
I remember the day vividly when I decided I wanted to install the Facebook Messenger app on my Windows 11 laptop. I’d been using Messenger on my phone for years, but I was tired of constantly switching devices just to keep up with conversations. With the need to streamline my communication and be more productive, I thought it would be incredibly convenient to have Messenger directly on my laptop.
At first, I assumed it would be a straightforward process. After all, Messenger is a widely used app, and Windows 11 is a modern operating system. How complicated could it be to get Messenger running on my laptop? However, I soon realized that the installation process wasn’t as seamless as I had anticipated.
My initial approach was to search for Messenger on the Microsoft Store. It seemed like the logical place to find the app, given that the Microsoft Store is designed for finding and installing software on Windows devices. I navigated to the Microsoft Store, typed “Facebook Messenger” into the search bar, and was met with a list of various apps and tools, but none seemed to be the Messenger app itself. Confused, I clicked through several options, only to find that they were either unrelated or not what I was looking for.
Frustration began to set in. I knew that Messenger had to be available for Windows in some form, so I decided to look for alternative methods. My next step was to search online for how to install Facebook Messenger on Windows 11. As I scrolled through forums and tech blogs, I came across several articles and discussions. Some suggested using third-party applications or web-based solutions, but I wanted a dedicated app that would offer the full functionality of Messenger without the need for workarounds.
Eventually, I discovered that Facebook Messenger doesn’t have a dedicated app available directly through the Microsoft Store for Windows 11. Instead, I needed to use the Messenger app from Facebook’s own website or leverage a web-based version of the app. This realization made me think that the installation process might be more involved than simply downloading an app from the store.
Determined to find a solution, I decided to proceed with the method recommended on one of the tech forums. This method involved using Facebook’s web-based Messenger app and creating a shortcut to it on my desktop. Here’s how I tackled the process:
-
Open Your Web Browser: I started by opening my preferred web browser. In my case, I used Google Chrome, but the steps would be similar for other major browsers.
-
Navigate to Messenger: I typed “Messenger.com” into the address bar and pressed Enter. This took me to the Messenger login page.
-
Log In to Facebook: After reaching the Messenger site, I logged into my Facebook account using my credentials. This step was crucial because it allowed me to access all my messages and conversations.
-
Create a Desktop Shortcut: Once I was logged into Messenger, I clicked on the three vertical dots in the upper-right corner of the browser window (Chrome’s menu). From the dropdown menu, I selected “More tools,” then “Create shortcut.”
-
Customize the Shortcut: A dialog box appeared asking me to name the shortcut. I named it “Messenger” and checked the box that said “Open as window” before clicking “Create.” This setting ensured that the Messenger window would open in its own dedicated window, similar to a standalone app.
-
Verify the Shortcut: I navigated to my desktop and found the new Messenger shortcut. Double-clicking it opened Messenger in a window separate from my browser tabs, giving me the experience I wanted.
The process was fairly straightforward once I understood the right approach. By using a web-based solution and creating a desktop shortcut, I effectively turned Messenger into a semi-app experience on my Windows 11 laptop. While it wasn’t a traditional app installation, it provided a convenient and efficient way to use Messenger without constantly switching between devices.
In the end, this solution worked perfectly for my needs. I was able to stay connected with my friends and family through Messenger while working on my laptop, all without the hassle of logging in and out or dealing with app stores. It was a satisfying resolution to my initial problem, and I was glad I took the time to find a workable solution.