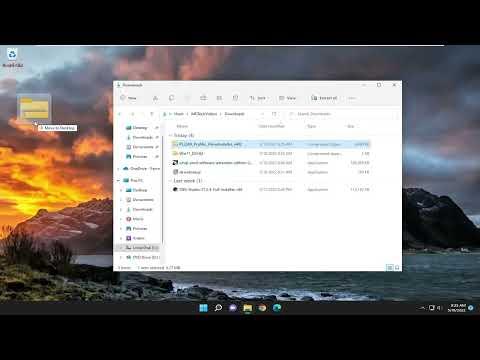
To install the PL2303 (Prolific) driver on Windows 11, you’ll need to follow a series of steps to ensure the driver is properly set up. Here’s how I went about it:Firstly, I started by identifying the exact PL2303 chip version I have. Different versions might need slightly different drivers, so I visited the Prolific website to find the correct driver. It’s important to make sure you download the right version to avoid compatibility issues.Next, I downloaded the driver from the Prolific official website. The site has a dedicated section for drivers, and I selected the Windows 11 version for my download. I made sure to download the driver package that matches my chip version.Once the download was complete, I extracted the files from the zip archive. This step is crucial because the files need to be unzipped before installation. I used a standard extraction tool like WinRAR or Windows’ built-in extractor to do this. After extracting, I located the setup file within the unzipped folder.I ran the setup file as an administrator. To do this, I right-clicked on the setup file and selected “Run as administrator.” This is an important step because it ensures that the driver installation has the necessary permissions to make changes to the system. The installation wizard then guided me through the process.During the installation, I followed the prompts provided by the wizard. I accepted the license agreement and chose the default installation settings. It’s usually best to go with default settings unless you have specific needs. After completing the installation, I was prompted to restart my computer.Upon rebooting, I connected the PL2303 device to a USB port on my computer. Windows 11 recognized the device and attempted to install the driver automatically. However, in some cases, this automatic installation might not work perfectly. If that happened, I needed to manually update the driver through Device Manager.To do this, I opened Device Manager by searching for it in the Start menu. In Device Manager, I found the “Ports (COM & LPT)” section and located the PL2303 device, which might appear as an unrecognized device or under a different name if the driver wasn’t installed correctly. I right-clicked on the device and selected “Update driver.”I chose the option to “Browse my computer for drivers” and then pointed to the folder where I had extracted the driver files earlier. This step allows Windows to locate the correct driver manually. I followed the on-screen instructions to complete the update. If Windows found a suitable driver, it would install it, and the device should be listed correctly under Device Manager once done.To ensure everything was working properly, I checked the “Properties” of the PL2303 device in Device Manager. Under the “Driver” tab, it should show that the driver is installed and working correctly. If there were any issues, Windows would provide error messages or status indicators that could help diagnose the problem.If the driver installation was successful but the device still wasn’t functioning as expected, I checked for any software that might be required to interact with the device. Sometimes, additional software is necessary to fully utilize the PL2303 device. I reviewed the documentation or support resources provided with the device or on the Prolific website.In case I encountered any errors or the device still wasn’t recognized, I revisited the Prolific website for troubleshooting tips or looked for updated driver versions. Occasionally, newer drivers or additional patches are released to fix compatibility issues or bugs.Ultimately, following these steps allowed me to successfully install the PL2303 (Prolific) driver on Windows 11. Ensuring that all components are up-to-date and correctly configured can resolve most installation issues and allow the device to function correctly with the new operating system.
How To Install Pl2303 (Prolific) Driver On Windows 11 [Tutorial]
