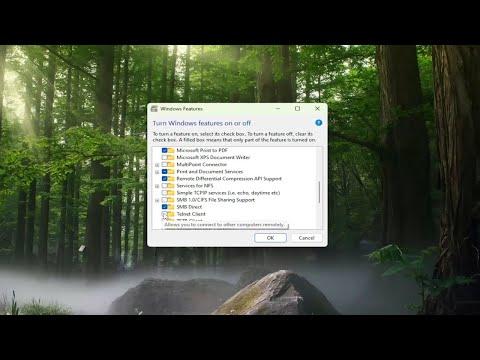
When I decided to install the Telnet client on Windows 10/11, it was because I needed to test some network services and troubleshoot a few connectivity issues. Telnet is a protocol that allows you to connect to remote servers and manage them using a command-line interface. Despite being an older technology, it remains useful for specific tasks. Here’s how I tackled the installation process.
First, I opened the Start menu and typed “Control Panel” into the search bar. Clicking on the Control Panel option brought me to the classic interface. From there, I navigated to “Programs,” which led me to “Turn Windows features on or off.” This was where I could manage optional features in Windows.
In the Windows Features dialog, I scrolled down the list until I found the “Telnet Client” checkbox. It’s worth noting that Telnet is not installed by default on Windows, so it’s necessary to add it manually. I checked the box next to “Telnet Client” and then clicked “OK.” Windows then began the process of installing the Telnet Client. This involved the system adding the necessary files and components.
The installation process took only a few moments, and once it was complete, I was ready to start using Telnet. To confirm that the installation had been successful, I opened the Command Prompt. I did this by typing “cmd” into the search bar and selecting the Command Prompt application from the search results.
In the Command Prompt window, I typed the command `telnet` and pressed Enter. If Telnet was installed correctly, the screen should have changed to a blank area with a blinking cursor, indicating that Telnet was ready to accept commands. This confirmed that the Telnet Client had been successfully added to my system.
With Telnet installed, I could now use it to connect to various network services. For instance, if I wanted to test connectivity to a specific server, I could use the command `telnet [hostname] [port]`. This allowed me to see if the server was reachable and if the specific port was open. It was particularly useful for troubleshooting network issues, as it provided direct feedback on the status of the connection.
One key thing I learned during this process was how to use Telnet for different tasks. For example, I could use Telnet to connect to email servers and check if they were functioning correctly. This is done by connecting to the server on port 25, which is the default port for SMTP. Similarly, connecting to port 110 allows you to test POP3 servers, and port 143 is used for IMAP servers. Each of these ports corresponds to different email protocols, and using Telnet helps in verifying that these services are responding as expected.
Although Telnet has largely been replaced by more secure protocols like SSH, it remains a valuable tool for certain types of network diagnostics. Its simplicity and direct nature make it useful for quick tests and troubleshooting, especially when dealing with legacy systems or certain network configurations.
In addition to the basic connectivity tests, Telnet can also be used to interact with other types of services. For example, you can connect to web servers on port 80 (HTTP) or port 443 (HTTPS), though for HTTPS, Telnet will only be able to confirm connectivity without providing encryption details.
Overall, installing Telnet on Windows 10/11 was a straightforward process. The built-in tools and options provided by Windows made it easy to add this feature. Once installed, Telnet proved to be a useful utility for diagnosing and troubleshooting network issues. Even though it’s an older technology, it still holds value for certain tasks where a simple command-line interface is needed to test network services and connectivity.
This installation and use of Telnet reminded me of the importance of having various tools available for network management. While newer technologies and protocols are often preferred for security and functionality, sometimes older tools like Telnet are still the ultimate choice for specific scenarios. This experience helped me understand the balance between using advanced, secure methods and relying on time-tested tools that can still perform essential tasks.
