When I first stumbled upon the issue of keeping my Steam profile private, it wasn’t due to any major security breach or personal conflict. Instead, it started with a simple desire for more privacy and control over who could see my gaming activities and achievements. I had been a regular Steam user for years, sharing my gaming exploits, game hours, and screenshots with friends and the wider community. However, as time passed, I realized I wanted more discretion. I didn’t want random users peeking into my gaming habits or seeing what I was playing at any given moment.
It all began when a colleague at work, who was also a gamer, mentioned how he had set his Steam profile to private. He explained that this allowed him to enjoy his gaming sessions without the constant prying eyes of others. This sparked my curiosity, as I had never really considered the implications of profile privacy on Steam before. The idea of controlling who could view my profile and what they could see was appealing. I wanted to make sure my gaming life remained more personal and secure, so I decided to explore how to achieve this.
The process of making my Steam profile private was surprisingly straightforward. Here’s how I approached it:
-
Accessing Your Steam Profile Settings:
To start, I needed to log into my Steam account. Once I was logged in, I navigated to my profile by clicking on my profile name at the top of the Steam window. This brought me to my profile page where all my public information was displayed. -
Navigating to Privacy Settings:
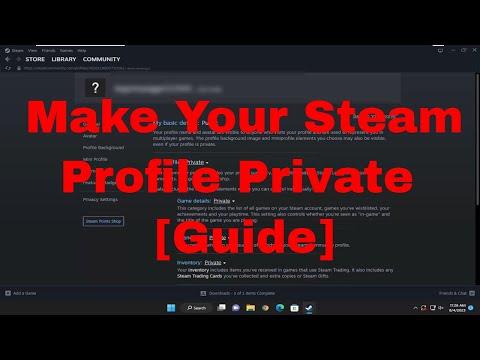
On my profile page, I found a button labeled “Edit Profile” on the right-hand side. Clicking this button took me to a menu with several options, including “My Privacy Settings.” This section was crucial because it allowed me to customize who could view my profile details. -
Adjusting Profile Privacy:
Within the “Privacy Settings” section, I saw a dropdown menu labeled “My Profile.” Clicking on this dropdown, I found several options: Public, Friends Only, and Private. The “Public” setting meant anyone on the internet could view my profile, which was the default setting. The “Friends Only” option restricted profile visibility to only those I had accepted as friends on Steam. The “Private” setting was the most restrictive, making my profile visible only to me. -
Setting Profile to Private:
I chose the “Private” option to ensure that no one else could see my profile information. This setting meant that even my friends wouldn’t be able to view my profile unless I specifically allowed them. After selecting this option, I clicked “Save” to apply the changes. -
Reviewing Other Privacy Settings:
It was also important to check other related privacy settings to ensure comprehensive control. I explored settings such as “Game Details,” where I could decide who could see what games I was playing or my achievements. Setting this to “Private” ensured that these details were hidden from everyone. -
Verifying the Changes:
After adjusting my privacy settings, I logged out of my Steam account to see how my profile appeared to others. This was a crucial step to confirm that my profile was indeed private and not visible to anyone who wasn’t authorized. Logging out and visiting my profile as a guest showed that it was now inaccessible, which reassured me that my privacy was intact.
The process of making my Steam profile private was both empowering and liberating. I felt a sense of control over my digital footprint, knowing that my gaming activities were shielded from public view. This change allowed me to enjoy my gaming sessions without concern, knowing that my profile remained private and secure. Ultimately, this experience taught me the value of online privacy and gave me the tools to manage my personal information more effectively.
