I remember the first time I encountered issues with managing app execution aliases on Windows 11. It was a typical day at work, and I was trying to streamline my development environment. My goal was to make sure that the various applications and tools I frequently use were easily accessible through the command line, but I ran into unexpected problems. Applications that should have been accessible weren’t working as expected, and it seemed like I had missed something important in the configuration process.
After some initial confusion, I realized that the problem was related to the app execution aliases. These aliases are essentially shortcuts that Windows creates to allow command-line access to apps without needing to specify their full paths. However, when these aliases aren’t managed properly, it can lead to errors and inefficiencies.
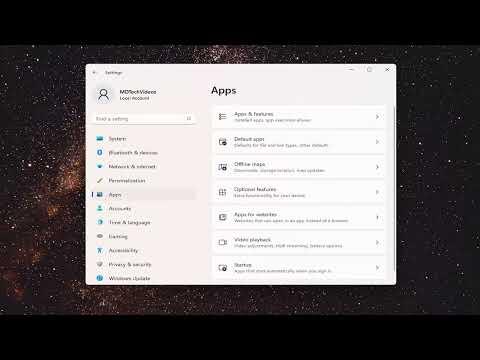
I started by diving into the Settings app to investigate. In Windows 11, the process is quite straightforward. I opened the Settings app and navigated to the “Apps” section. There, I found an option labeled “App execution aliases.” This is where Windows allows users to view and manage the list of app aliases that have been configured.
The first step in managing these aliases is to understand which ones are currently active. In my case, I saw a long list of aliases, many of which were for applications I no longer used. Some of these aliases were conflicting with others, causing the issues I had been experiencing.
To resolve the issues, I began by disabling the aliases that were causing conflicts. I did this by toggling off the switch next to each problematic alias. This action immediately stopped the alias from being active, which helped resolve some of the conflicts I was facing. For instance, an alias for an old version of a tool I had upgraded was still active, and turning it off fixed the problem of the command not executing properly.
Next, I focused on adding new aliases for the applications I frequently use. To do this, I had to create custom aliases for the command-line tools that I needed. This process involved creating a new alias entry, specifying the path to the executable file, and assigning a name for the alias. It’s important to ensure that the path provided is accurate and that the alias name is unique to avoid further conflicts.
One of the key lessons I learned was to periodically review and update the app execution aliases. Over time, as I installed new applications and updated existing ones, the list of aliases could become cluttered with outdated or redundant entries. Regularly checking this list and removing obsolete aliases helped maintain a clean and functional command-line environment.
For Windows 10, the process is quite similar, though the interface is slightly different. I accessed the “Settings” menu, then went to “Apps” and selected “Manage app execution aliases.” From there, I could see all the existing aliases and manage them in the same way I did in Windows 11.
Additionally, I found it useful to familiarize myself with the command-line tools provided by Windows for managing application paths. Tools like setx can be used to set environment variables, including paths to application executables. This can be particularly handy for more advanced setups or when dealing with complex configurations.
In summary, managing app execution aliases on Windows 11/10 involves understanding which aliases are active, disabling conflicting or outdated aliases, and creating new ones as needed. Regular maintenance of these aliases ensures a smoother experience when accessing applications via the command line. By following these steps, I was able to overcome the challenges I faced and create a more efficient and organized environment for my work.
