I remember the first time I faced issues with managing power settings on my Windows 10 laptop. It was a frustrating experience, one that led me to search for solutions to ensure my computer would perform optimally and conserve battery life when needed. The problem started when I noticed my laptop was not holding a charge as well as it used to. Despite being plugged in, it seemed to struggle with maintaining power. Additionally, performance seemed to lag during critical moments. I decided it was time to delve deeper into the power management settings to find a solution.
I began by exploring the power settings available in Windows 10. The process was relatively straightforward, though it required navigating through several menus. My first step was to access the Power & sleep settings by right-clicking on the battery icon in the system tray and selecting “Power & sleep settings.” This led me to a page where I could adjust various aspects of how my laptop manages power.
The options presented included screen and sleep settings. I noticed that the screen was set to turn off after a short period of inactivity, which I thought might be contributing to the battery drain issue. I decided to extend the time before the screen would turn off to ensure that it wasn’t unnecessarily consuming power during my usage. Similarly, I adjusted the sleep settings to prevent the laptop from entering sleep mode too quickly. These changes seemed like a good starting point to address the immediate issue.
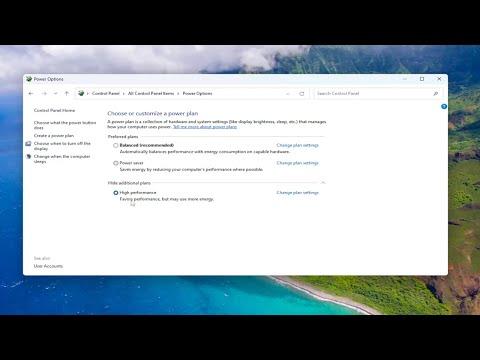
Next, I delved into the advanced power settings. By clicking on “Additional power settings” found within the Power & sleep settings page, I accessed the Power Options window. Here, I chose “Change plan settings” for the currently selected power plan and then clicked on “Change advanced power settings.” This led me to a detailed list of settings that I could adjust to fine-tune my laptop’s power management.
One of the first settings I focused on was the “Processor power management.” Under this section, I found options to adjust the minimum and maximum processor state. I learned that setting the maximum processor state to 100% ensured that my laptop would use its full power when needed, but I could also set a lower value to save battery when high performance wasn’t necessary. I experimented with different settings to find a balance between performance and battery life.
Another critical area I addressed was the “Battery” settings. Within this section, I adjusted settings for the “Low battery level” and “Critical battery level” notifications. Ensuring these were set appropriately helped me be more aware of when my battery was running low, so I could take action before it impacted my work.
After making these adjustments, I noticed a significant improvement in my laptop’s battery performance and overall responsiveness. However, I didn’t stop there. I decided to explore the new power management features introduced in Windows 11, as I was considering upgrading my system.
In Windows 11, the power management settings are quite similar but with a more refined interface. I started by accessing the Power & battery settings from the system tray. Here, I found options to configure screen and sleep settings in a more streamlined manner compared to Windows 10. I was particularly impressed by the new “Power mode” feature, which allowed me to select between “Best battery life,” “Balanced,” and “Best performance.” I opted for “Balanced” to strike a good compromise between performance and battery life, though I occasionally switched to “Best performance” when running resource-intensive applications.
Another useful feature in Windows 11 was the “Battery saver” mode, which automatically activates when the battery drops below a certain percentage. This mode helps conserve battery life by limiting background activity and reducing screen brightness. I adjusted the settings for Battery saver to activate at a lower battery threshold, giving me more time to plug in before running out of power.
Both Windows 10 and 11 offer tools for monitoring battery usage and performance. In Windows 11, I found the “Battery usage by app” feature particularly useful. It showed me which applications were consuming the most battery, allowing me to close or limit their usage when necessary. This helped me manage my power consumption more effectively and extend battery life throughout the day.
Ultimately, managing power settings effectively in Windows 10 and 11 requires understanding the various options available and making adjustments based on your specific needs. By exploring both operating systems’ settings and experimenting with different configurations, I was able to optimize my laptop’s performance and battery life. It’s a process of trial and error, but with a bit of patience, you can achieve a setup that works best for your usage patterns.
