I was working on a project that required me to share some important spreadsheets with my team. After finalizing all the data and formatting it perfectly, I realized that I needed to send these spreadsheets in a more universally accessible format. That’s when it hit me: I needed to convert my Excel sheets into PDFs. It seemed straightforward enough, but as I dove into the process, I discovered a few nuances and options that I hadn’t anticipated.
Initially, I wasn’t entirely sure how to print my Excel documents as PDFs, so I turned to Microsoft Excel’s built-in options for guidance. What I found was a set of straightforward steps that I would need to follow to ensure my spreadsheets were converted accurately. The first step was to open the Excel file that I wanted to convert. This was simple since I already had the file open on my desktop. I made sure that all the necessary data was visible and correctly formatted before moving on to the conversion process.
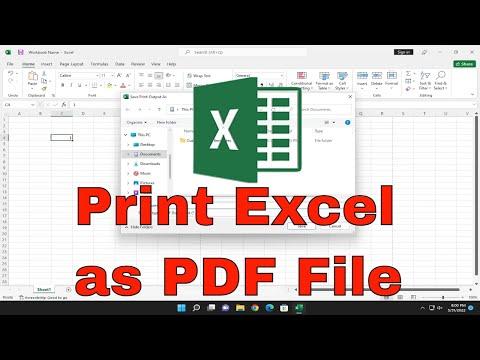
In Excel, the process to save or print a file as a PDF begins with accessing the “File” tab in the upper left corner of the window. From there, I clicked on the “Save As” option. This brought up a menu where I needed to choose the location where I wanted to save my PDF file. Since I wanted to keep things organized, I selected a specific folder on my computer dedicated to project files.
After selecting the location, the next step was to choose the file format. In the “Save as type” dropdown menu, I found a list of different formats. I selected “PDF” from this list. It was a relief to see that the PDF option was readily available and that I didn’t need to install any additional software or plugins. This built-in functionality in Excel was proving to be quite convenient.
Before finalizing the conversion, I took a moment to adjust the PDF options. By clicking on the “Options” button in the Save As dialog box, I accessed a few settings that allowed me to tailor the PDF output to my needs. For instance, I could choose whether to publish the entire workbook or just a specific sheet. Since I only needed one particular sheet, I selected that option. Additionally, I checked the “Optimize for” setting, where I chose the “Standard (publishing online and printing)” option to ensure high quality.
After adjusting these settings, I clicked the “Save” button. The conversion process began, and a progress bar appeared, showing the status of the conversion. Within moments, the process was complete, and I found the PDF file in the folder I had chosen earlier. I opened the PDF to review it, and everything looked perfect. The formatting and data were preserved exactly as I had intended.
However, the simplicity of the process belied a few complexities that I encountered during my work. For example, while the built-in PDF conversion worked well for most cases, I sometimes needed more advanced features. On one occasion, I had a large workbook with multiple sheets and complex formatting. The standard conversion didn’t always handle these nuances perfectly. For such situations, I found that using a dedicated PDF conversion tool could offer more control.
One tool that I found particularly useful was Adobe Acrobat. With Acrobat, I could open my Excel file directly and have more options for adjusting the PDF settings. This tool provided features like combining multiple sheets into one PDF, adding bookmarks, and adjusting the layout to fit specific requirements. I could also ensure that the final PDF maintained the integrity of complex elements like charts and conditional formatting, which sometimes got lost in simpler conversion methods.
Another scenario that required additional attention was dealing with large files. Sometimes, my Excel files were too large to handle smoothly in the standard conversion process. In these cases, I discovered that splitting the workbook into smaller sections before converting each section individually was a helpful strategy. Afterward, I could merge these smaller PDF files using PDF tools to create a cohesive document.
To ensure that I was always prepared for any situation, I also explored various settings in Excel’s print options. By going to the “Print” menu and selecting “Microsoft Print to PDF” as the printer, I could fine-tune how the document was rendered as a PDF. This method allowed me to preview how the document would look before finalizing it, and it was particularly useful when working with specific print areas or needing to adjust page layouts.
In conclusion, converting Microsoft Excel files to PDF can be a straightforward task with the right approach. The built-in “Save As” feature in Excel is effective for basic needs, but exploring additional tools and options can help handle more complex requirements. Whether dealing with intricate formatting, large files, or specific layout needs, having a few extra strategies and tools at hand ensures that the final PDF output meets all of my expectations.