Setting the paging file in Windows 10 correctly can significantly impact system performance, especially if you’re running applications that consume a lot of memory or if you have limited physical RAM. Here’s a detailed tutorial on how to properly configure the paging file on your Windows 10 machine.
To begin, the paging file, also known as the virtual memory or swap file, is a space on your hard drive that Windows uses as additional memory when your physical RAM is fully utilized. By adjusting its size, you can enhance system stability and performance. Here’s how I approached setting up the paging file on my system.
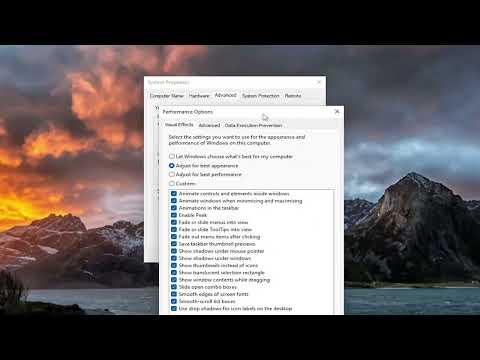
First, I accessed the System Properties. I right-clicked on the Start menu and selected “System.” In the window that opened, I clicked on “Advanced system settings” on the left sidebar. This action brought up the System Properties dialog box, where I navigated to the “Advanced” tab. Under the Performance section, I clicked on “Settings.”
In the Performance Options window that appeared, I switched to the “Advanced” tab. Here, I found the Virtual memory section and clicked on the “Change” button. This step opened up the Virtual Memory dialog box where I could configure the paging file settings.
By default, Windows manages the paging file size automatically, but I decided to customize it for better control. I unchecked the box that says “Automatically manage paging file size for all drives.” This action enabled the options below for manual configuration.
Next, I selected the drive where I wanted to set the paging file. Typically, it’s recommended to place the paging file on a drive other than the one where Windows is installed, if possible, to optimize performance. For this tutorial, I chose the C: drive, which is the system drive.
I then selected the “Custom size” option, which allowed me to specify both the initial size and the maximum size of the paging file. To determine appropriate sizes, I researched and found that a common recommendation is to set the initial size to 1.5 times the amount of RAM installed on my system and the maximum size to 3 times the RAM. For instance, if I had 8 GB of RAM, I would set the initial size to 12 GB and the maximum size to 24 GB.
After inputting these values, I clicked on “Set” to apply the changes. The system asked for confirmation, and I clicked “OK” to proceed. I repeated this process for any other drives I had selected, ensuring that the settings were applied consistently.
It’s crucial to note that changing the paging file settings requires a system restart to take effect. I clicked “OK” on all dialog boxes and restarted my computer to ensure that the new paging file configuration was properly applied.
Upon reboot, I checked the new paging file settings to ensure everything was set up correctly. I did this by going back to the Performance Options window, as described earlier, to verify that the initial and maximum sizes were as I had configured them. This step helped confirm that my adjustments had been successfully applied.
Adjusting the paging file settings can lead to improved system performance, especially when dealing with memory-intensive applications. However, it’s also essential to monitor your system’s performance after making these changes. If you notice any issues or if the system performance is not as expected, you might need to revisit the settings and make further adjustments.
In conclusion, setting the paging file in Windows 10 involves accessing the system properties, customizing the paging file size, and applying the changes. By properly configuring the paging file, you can optimize your system’s performance and stability. This process is straightforward but requires careful consideration of the appropriate sizes based on your RAM and system needs.