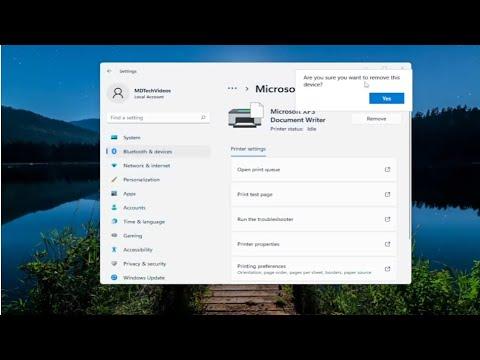
I recently encountered a situation where I needed to remove the Microsoft XPS Document Writer printer from my Windows 11 setup. While it might seem like a straightforward task, there were several steps involved that I had to navigate carefully. Here’s how I went about it, and I hope my experience can be helpful to others facing the same issue.The Microsoft XPS Document Writer is a virtual printer that comes pre-installed with Windows. It allows users to save documents in the XPS format, which is similar to PDF. While this can be useful for some, I found that I didn’t need it, and it was taking up space in my list of printers. So, I decided to remove it.The first thing I did was to open the Settings app on my Windows 11 machine. To do this, I clicked on the Start button, then selected the gear icon to access Settings. Alternatively, I could have pressed the Windows key + I to open Settings directly. Once I was in the Settings menu, I navigated to the “Devices” section. This is where you can manage everything related to printers and other connected devices.In the “Devices” section, I selected “Printers & scanners.” This brought up a list of all the printers and scanners currently installed on my system. The list included my physical printers, as well as virtual ones like the Microsoft XPS Document Writer.I located the Microsoft XPS Document Writer in the list. To remove it, I first clicked on it to select it, which opened up a few options. There was a button labeled “Remove device” which I clicked. This was the first step, but I knew from experience that sometimes virtual printers like this might not be fully removed just by doing this.To ensure that the Microsoft XPS Document Writer was entirely removed from my system, I needed to take additional steps. So, I moved on to the Control Panel. I accessed the Control Panel by typing “Control Panel” into the search box on the taskbar and selecting it from the search results.Once in the Control Panel, I clicked on “View devices and printers” under the “Hardware and Sound” section. This opened a window showing all the devices connected to my computer, including printers. I found the Microsoft XPS Document Writer again in this window.Right-clicking on it, I selected “Remove device” from the context menu. This action might seem redundant, but it’s sometimes necessary to ensure that the printer is completely removed from the list of devices.After doing this, I decided to restart my computer. Restarting helps to clear out any residual settings or configurations related to the device that might not be removed immediately. Once my computer rebooted, I went back to the “Devices and Printers” section to double-check that the Microsoft XPS Document Writer was indeed gone.However, if you still find that the printer appears in the list or if you’re encountering issues with it being removed, you might need to use a more thorough approach involving the command line. I opened Command Prompt with administrative privileges by searching for “cmd” in the search bar, right-clicking on Command Prompt, and selecting “Run as administrator.”In the Command Prompt window, I typed the following command to list all the printers installed on my system:shellCopy codewmic printer list brief
This command provides a list of all printers, including virtual ones like the XPS Document Writer. I looked through the list to confirm that the Microsoft XPS Document Writer was indeed still listed.To remove it, I used the following command:shellCopy codeprintui /dl /n “Microsoft XPS Document Writer”
This command uses the PrintUI utility to delete the specified printer. After running the command, I checked again to see if the printer was still listed.If you are still encountering difficulties, another approach involves dealing with system files. I accessed the Print Management tool by typing “printmanagement.msc” into the search box and pressing Enter. This opens a dedicated utility for managing printers. In the Print Management window, I navigated to the “All Printers” section, located the Microsoft XPS Document Writer, and attempted to delete it from there.Finally, it’s worth mentioning that sometimes the Microsoft XPS Document Writer might be reinstalled automatically if you reinstall or reset certain Windows components. Therefore, keeping track of this removal process and ensuring no related files are left behind can help in avoiding any future reinstallation of the virtual printer.In summary, removing the Microsoft XPS Document Writer from Windows 11 involves several steps, starting from the Settings app, moving through the Control Panel, and if necessary, using Command Prompt or Print Management tools. By following these steps carefully, I was able to remove the unwanted virtual printer and clean up my device list effectively.
How to Remove Microsoft XPS Document Writer Printer in Windows 11/10 [Tutorial]
