I remember the first time I encountered the issue of the “ms-resource
/Text” entry in my Windows Start Menu. It was one of those annoying problems that seemed to pop up out of nowhere, leaving me puzzled and a bit frustrated. I had just installed a new application on my computer, and everything seemed to be going smoothly. However, after the installation, I noticed a strange entry in my Start Menu that read “ms-resource
/Text.” It wasn’t the name of any application I recognized, and it didn’t seem to correspond to any of my installed programs. This mysterious placeholder text was not only confusing but also cluttered my Start Menu, making it look disorganized.
The issue appeared to be linked to a poorly configured application or a system bug that had somehow replaced the proper application name with this cryptic “ms-resource” string. At first, I wasn’t sure how to tackle it. I tried rebooting my computer, hoping it might fix the issue, but the entry remained stubbornly in place. I then began to delve deeper into the problem, searching online for any similar experiences or solutions.
After some extensive research, I discovered that this problem often arises when an app’s localization resources are not properly defined or when there’s a glitch in the app’s installation process. This was helpful in narrowing down the potential causes. I found a few potential fixes online, but many seemed complicated or involved risky steps. I needed a solution that was straightforward and safe, as I didn’t want to risk further complicating my system.
The ultimate solution I found involved a combination of simple troubleshooting steps that helped me remove the unwanted “ms-resource” entry from my Start Menu. Here’s what I did:
-
Uninstall and Reinstall the Application: The first step was to uninstall the application that had caused the issue. To do this, I went to the Start Menu, located the app, right-clicked on it, and selected “Uninstall.” After the app was removed, I rebooted my computer to ensure that all residual files and settings were cleared. Once the system was restarted, I reinstalled the application from a reliable source. This fresh installation often resolves issues related to broken or missing localization resources.
-
Clear the Start Menu Cache: Sometimes, the Start Menu cache can cause display issues. To clear it, I needed to delete the cache files manually. I opened File Explorer, navigated to the following path:
C:\Users\[Your Username]\AppData\Local\TileDataLayer\Database. In this folder, I deleted the files related to the Start Menu cache. After doing this, I restarted my computer once more. This action forces Windows to rebuild the Start Menu database, which can resolve any display issues like the “ms-resource” entry. -
Check for Windows Updates: Occasionally, system updates can fix bugs and issues that may not be resolved by other methods. I made sure my Windows was up to date by going to Settings > Update & Security > Windows Update and clicking on “Check for updates.” After ensuring my system was fully updated, I restarted my computer.
-
Use the System File Checker Tool: To rule out any system file corruption, I ran the System File Checker tool. I opened Command Prompt as an administrator and typed
sfc /scannow, then pressed Enter. This tool scanned and repaired any corrupted system files, which might have been contributing to the problem. After the scan was complete, I rebooted my computer to see if the issue was resolved. -
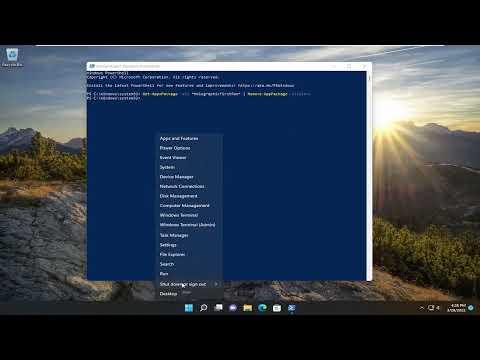
Reset the Start Menu Layout: If the above steps didn’t work, I considered resetting the Start Menu layout. To do this, I opened PowerShell as an administrator and ran the following command:
Get-AppxPackage *windows-store* | Remove-AppxPackage. This command removed the Windows Store app, which can sometimes fix Start Menu issues. After removing the app, I reinstalled it from the Microsoft Store. This reset the Start Menu layout and resolved the “ms-resource” entry issue.
Through this process, I managed to remove the troublesome entry from my Start Menu and restore it to its normal state. While the issue was frustrating, following these steps systematically helped me address and fix the problem without causing further complications. If you find yourself in a similar situation, I hope these solutions prove to be as effective for you as they were for me.
