I vividly remember the day I ran into the issue of renaming my PC in Windows 11. It all started when I was setting up my new work-from-home environment. With all the new equipment and software, I wanted everything to be perfectly organized, and a crucial part of that was making sure my computer had a name that matched my new setup. Little did I know, this seemingly simple task would turn into a bit of an ordeal.
When I first encountered the problem, I was already familiar with the process of renaming computers from my previous experiences with older versions of Windows. However, Windows 11 introduced some changes, and I found myself struggling to find the right steps to make it happen. I scoured through various forums and online guides, but nothing seemed to match my version of Windows 11 perfectly.
Determined to figure it out, I decided to dive into the settings and start experimenting. The first thing I did was open the Start menu and look for the Settings app. I had a vague recollection that this was where I could change system settings, including the computer name. As soon as I launched the Settings app, I navigated to the System section, where I saw several options related to system information.
I clicked on the “System” category, hoping to find a straightforward way to rename my PC. After exploring the options under this section, I stumbled upon a link labeled “About.” Clicking on it, I was greeted with a summary of my system’s information, including the device name. This seemed like the place I needed to be, but I couldn’t find any obvious way to rename the PC right away.
I then noticed a small, but crucial, link that said “Rename this PC.” This was my breakthrough moment. Clicking on it opened a new window with a field where I could enter the new name I wanted for my computer. I quickly typed in a name that reflected my new home office setup, something that would make it easier for me to identify my PC on the network. I was thrilled to see that the process seemed to be straightforward after all.
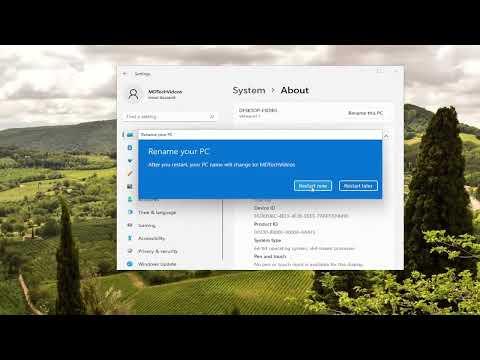
However, before I could get too excited, I was presented with a prompt asking me to restart my computer for the changes to take effect. This was something I wasn’t expecting, as I thought the change would be instantaneous. Despite my slight frustration at the need for a restart, I complied, saving all my work and restarting my PC.
Upon rebooting, I checked the system information once again to confirm that the name had been updated. To my relief, the new name appeared exactly as I had entered it. This was a small victory, but it meant a lot to me given the confusion and effort I had invested in solving the problem.
Reflecting on the entire experience, I realized that the process of renaming a PC in Windows 11 was not overly complicated, but it was slightly different from what I was used to. The interface had changed, and some steps were not as intuitive as I had hoped. Nevertheless, with a bit of patience and exploration, I was able to achieve the result I wanted.
If anyone else finds themselves in a similar situation, I would recommend starting by opening the Settings app and navigating to the System section. From there, the “About” link will lead you to the option to rename your PC. Make sure to save your work before restarting your computer, as this step is crucial for the new name to take effect.
In the end, the process was a valuable lesson in adapting to new technology and finding solutions to seemingly simple problems. It reminded me that even though technology is constantly evolving, the fundamental steps to solve issues often remain the same.