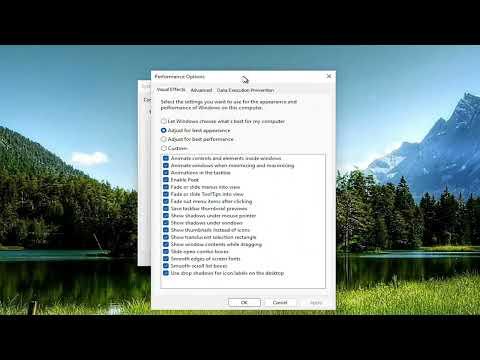
When I decided to reset the virtual memory or page file in Windows 11/10, I knew it was essential to understand the process thoroughly to ensure smooth system performance. Virtual memory, also known as a page file, acts as an extension of the physical RAM, allowing Windows to handle more tasks simultaneously than what the RAM alone could manage. However, there are times when resetting or adjusting this virtual memory can help resolve performance issues, system errors, or just optimize the system for better efficiency.To begin, I first made sure to back up my important data. It’s always wise to back up crucial files before making changes to system settings. With that step out of the way, I followed a systematic approach to resetting the virtual memory.First, I opened the Settings app by pressing the Windows key + I on my keyboard. In the Settings menu, I navigated to the System section and then to the About tab. Here, I clicked on the “Advanced system settings” link on the right side. This action opened the System Properties window, which is crucial for configuring advanced system settings.In the System Properties window, I switched to the Advanced tab and clicked on the “Settings” button under the Performance section. This brought up the Performance Options window. I then clicked on the Advanced tab within this window, where I found the Virtual Memory section. Clicking on the “Change” button allowed me to access the virtual memory settings.By default, Windows manages the page file size automatically, but since I wanted to reset it, I first unchecked the “Automatically manage paging file size for all drives” option. This enabled me to customize the settings. I selected the drive where the page file is located, typically the C: drive, and chose the “No paging file” option. After selecting this, I clicked on “Set” to apply the changes.Next, I needed to reboot the system to ensure these changes took effect. Once the system restarted, I repeated the process to re-enable the page file. This time, instead of choosing “No paging file,” I selected the “System managed size” option, which allows Windows to automatically handle the page file size based on system needs. I clicked on “Set” again to apply the new settings.It was also possible to set a custom size for the page file, which I considered based on my specific needs. I could have entered initial and maximum size values manually, but opting for the system-managed size usually suffices for most users.After applying these settings and restarting the system once more, I noticed a more stable performance in my Windows environment. Resetting the virtual memory can help resolve issues such as system crashes, slow performance, or memory-related errors, and this process helped in optimizing my system.Throughout this process, I made sure to keep track of any changes and their impacts on system performance. Monitoring system performance after making adjustments is crucial to understanding whether the changes had the desired effect or if further tweaks were necessary.In conclusion, resetting the virtual memory or page file in Windows 11/10 is a straightforward process that involves adjusting settings in the system properties and performance options. By carefully following these steps, I was able to reset and reconfigure the virtual memory, which contributed to a more efficient and stable system performance.
How To Reset Virtual Memory Or Page File In Windows 11/10 [Tutorial]
