I never thought that updating Windows could become a problem until I encountered an issue that left me frustrated and stuck. It all began when I tried to install the latest Windows 11 update on my computer. I was excited about the new features and performance improvements, but things quickly took a turn for the worse. The update process stalled halfway through, and the progress bar just sat there, frozen. I waited for hours, hoping it would resolve itself, but nothing changed. Restarting my computer didn’t help, and I couldn’t even access the update settings to try and fix the problem.
After some research, I discovered that my situation wasn’t unique. Many users face issues with Windows Update, and it can be particularly frustrating when the built-in tools don’t resolve the issue. I needed a solution to reset Windows Update and get my system back on track. Here’s how I tackled the problem and successfully reset Windows Update in Windows 11.
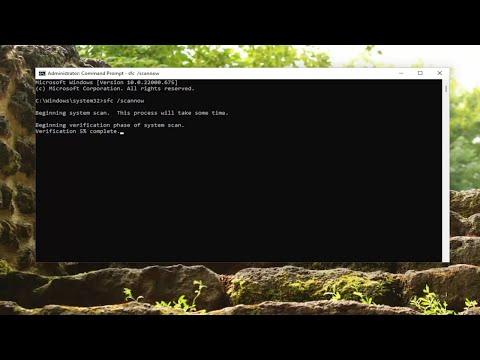
First, I decided to stop the Windows Update services that might be causing conflicts. To do this, I opened the Command Prompt as an administrator. To run Command Prompt as an administrator, I pressed the Windows key, typed “cmd” into the search bar, right-clicked on “Command Prompt” from the search results, and selected “Run as administrator.” I saw the User Account Control prompt asking for permission to allow Command Prompt to make changes to my device, so I clicked “Yes.”
Once the Command Prompt window was open with administrative privileges, I typed the following commands one by one and pressed Enter after each one:
arduinonet stop wuauserv net stop cryptSvc net stop bits net stop msiserver
These commands stop the Windows Update service, Cryptographic service, Background Intelligent Transfer Service, and the Windows Installer service. Stopping these services ensured that no processes were running that could interfere with the resetting of Windows Update components.
Next, I needed to delete the contents of the SoftwareDistribution and Catroot2 folders. These folders store temporary files related to updates, and clearing them out can help resolve update issues. In the Command Prompt, I typed the following commands to delete these folders:
bashdel %windir%\SoftwareDistribution\*.* /s /q del %windir%\System32\catroot2\*.* /s /q
These commands delete all files within the SoftwareDistribution and Catroot2 folders. The “/s” switch tells the command to delete all files in subdirectories, and the “/q” switch performs the deletion without prompting for confirmation. By clearing out these folders, I ensured that any corrupted or outdated files that might have been causing the update issue were removed.
After deleting the files, I needed to restart the services I had stopped earlier. In the same Command Prompt window, I typed the following commands and pressed Enter after each one:
sqlnet start wuauserv
net start cryptSvc
net start bits
net start msiserver
These commands restart the Windows Update service, Cryptographic service, Background Intelligent Transfer Service, and the Windows Installer service. Restarting these services allowed them to function properly again and potentially resolve any issues related to Windows Update.
At this point, I was ready to check if the update issue was resolved. I closed the Command Prompt window and restarted my computer to ensure that all changes took effect. Once my computer had rebooted, I navigated to the Windows Update settings to check for updates. To do this, I opened the Settings app by pressing the Windows key + I. In the Settings app, I selected “Update & Security,” then “Windows Update,” and clicked on “Check for updates.”
To my relief, the update process began to work correctly. Windows started downloading the latest updates, and this time, there were no interruptions or errors. The updates installed smoothly, and my computer was back to running optimally.
In addition to resetting Windows Update, I also took some preventive steps to avoid future issues. I ensured that my computer’s drivers and firmware were up to date, as outdated drivers can sometimes cause conflicts with Windows Update. I also made sure that my internet connection was stable and reliable, as a poor connection could interfere with the update process.
Overall, resetting Windows Update in Windows 11 involved stopping and restarting services, clearing out temporary files, and then checking for updates again. It was a straightforward process, but it required careful attention to detail to ensure everything was done correctly. If you ever encounter similar issues with Windows Update, following these steps can help you resolve the problem and get your system back on track.