I remember the first time I encountered a DNS issue on my Windows 11 machine; it felt like a roadblock in a race that had just started. I had been working on an important project and suddenly, I found myself unable to access any websites. It was as if the internet had vanished from my computer. I tried restarting my browser and then my computer, but nothing seemed to work. Frustrated, I knew I had to get to the bottom of this problem to continue with my work.
The issue seemed to be with DNS, the Domain Name System. DNS is essentially what translates human-friendly domain names like “example.com” into IP addresses that computers use to identify each other on the network. When DNS fails, it’s like having a phone book with all the names but no phone numbers; you know the names, but you can’t call anyone.
Initially, I didn’t know where to start troubleshooting. My first instinct was to check my internet connection. I went to the network settings, but everything appeared to be in order. The problem wasn’t with my internet connection itself since other devices in my home were working fine. So, the issue seemed to be isolated to my Windows 11 computer.
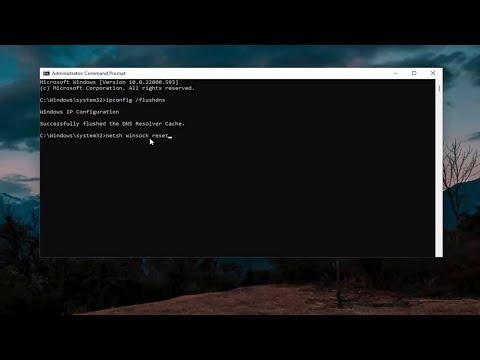
To tackle this, I decided to dive into a series of troubleshooting steps. The first thing I did was flush the DNS cache. Sometimes, outdated or corrupted data in the DNS cache can cause issues. To flush the DNS cache, I opened the Command Prompt as an administrator. I did this by searching for “Command Prompt” in the Start menu, right-clicking on it, and selecting “Run as administrator.” In the Command Prompt window, I typed the command ipconfig /flushdns and hit Enter. This command clears the DNS cache and forces the computer to obtain fresh DNS information.
After flushing the DNS cache, I restarted my computer. However, the problem persisted. Next, I decided to check if my DNS settings were configured correctly. I went to the Settings app by pressing the Windows key and then selecting “Settings.” From there, I navigated to “Network & Internet” and then “Status.” I clicked on “Properties” under my network connection and scrolled down to “DNS server assignment.”
I noticed that my DNS servers were set to automatic. While this is usually fine, I decided to manually configure a public DNS server to see if that would resolve the issue. Public DNS servers like those provided by Google or Cloudflare are often more reliable. I chose Google’s DNS servers: 8.8.8.8 and 8.8.4.4. To set this up, I clicked on “Edit” under DNS server assignment, selected “Manual,” and then entered the Google DNS server addresses. After applying the changes, I restarted my computer once more.
Still, the problem wasn’t resolved. At this point, I suspected there might be an issue with the network adapter’s configuration or drivers. I decided to check if my network adapter’s driver was up to date. I opened the Device Manager by pressing Windows + X and selecting “Device Manager” from the menu. In Device Manager, I expanded the “Network adapters” section, right-clicked on my network adapter, and selected “Update driver.” I chose the option to search automatically for updated driver software. Windows searched and found a new driver, which I then installed. After the installation, I restarted my computer again.
With a hopeful mindset, I tested my internet connection, but the issue persisted. I realized that my next step was to reset the network settings. Windows 11 offers a built-in feature to reset network settings, which can often resolve persistent issues. To do this, I went back to the Settings app, navigated to “Network & Internet,” and then to “Advanced network settings.” Under the “More settings” section, I selected “Network reset” and clicked on “Reset now.” This action would remove and reinstall all network adapters and reset all networking components to their default settings.
After the network reset, my computer rebooted, and I reconnected to my network. This time, my internet connection was working again! It seemed that resetting the network settings had resolved the DNS issue. I tested browsing multiple websites to ensure everything was functioning properly.
Reflecting on the experience, it was a mix of trial and error, but I learned a lot about troubleshooting DNS issues on Windows 11. The key steps involved flushing the DNS cache, configuring DNS settings manually, updating network drivers, and, if all else fails, performing a network reset. Each step served as a potential solution to the problem, and through persistence, I managed to resolve the issue and get back to my work.
This experience taught me that sometimes technical problems require a methodical approach to solving them. It’s important to check basic settings first, and if necessary, delve deeper into more advanced troubleshooting methods. It’s always reassuring to know that most issues can be resolved with a bit of patience and systematic problem-solving.
