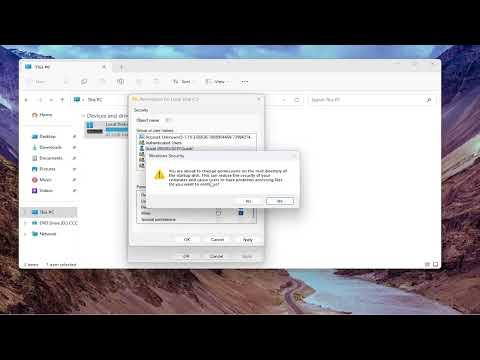
Restricting access to drives in Windows 11 is a crucial step for managing security and privacy, especially in environments where multiple users share a computer or where sensitive data needs protection. In this tutorial, I’ll walk you through the steps to restrict access to drives, ensuring that only authorized users can view or modify the contents.
To start with, it’s essential to understand that Windows 11 provides several methods for restricting drive access. The approach you choose will depend on your specific needs—whether you want to hide a drive from being displayed in File Explorer, restrict access to certain users, or even prevent access altogether. I’ll cover these methods in detail to help you decide the best fit for your situation.
The first method involves using the built-in Disk Management tool. This tool allows you to change drive letters, format drives, and manage partitions, but it also offers a straightforward way to hide a drive from being visible in File Explorer. Here’s how to do it:
1. **Open Disk Management**: Press `Win + X` and select `Disk Management` from the menu.
2. **Find the Drive**: Locate the drive you want to hide in the list of volumes.
3. **Change Drive Letter and Paths**: Right-click the drive and choose `Change Drive Letter and Paths`.
4. **Remove the Drive Letter**: Click `Remove`, then confirm by clicking `Yes`. Removing the drive letter will make the drive invisible in File Explorer. Note that this doesn’t prevent access through other means, such as via the command line or other tools.
For a more comprehensive approach, especially if you need to restrict access based on user permissions, you can use the Properties settings of the drive. Here’s how you can set up user-based restrictions:
1. **Open File Explorer**: Right-click on the drive you want to restrict and select `Properties`.
2. **Go to Security Tab**: Navigate to the `Security` tab. Here, you can see a list of users and groups that have access to the drive.
3. **Edit Permissions**: Click on `Edit` to change permissions. You can select a user or group and adjust the permissions by checking or unchecking boxes such as `Full Control`, `Modify`, `Read & Execute`, etc.
4. **Apply and Confirm**: After setting the desired permissions, click `Apply` and then `OK`. This will restrict access to the drive based on the permissions you have set.
For environments where multiple users have their accounts on the same computer, utilizing Windows 11’s Group Policy Editor can provide more granular control. Here’s how you can use Group Policy to restrict access to drives:
1. **Open Group Policy Editor**: Press `Win + R`, type `gpedit.msc`, and hit `Enter`.
2. **Navigate to Drive Restrictions**: Go to `User Configuration` > `Administrative Templates` > `Windows Components` > `File Explorer`.
3. **Enable Policy**: Look for the policy named `Hide these specified drives in My Computer`. Double-click on it and select `Enabled`. You can then choose which drives to hide from the drop-down menu.
4. **Apply Settings**: Click `Apply`, then `OK` to enforce the policy. This will hide the selected drives from all users, making them invisible in File Explorer.
If you need even tighter control, you can use the Registry Editor to hide drives. This method is more advanced and should be used with caution, as incorrect changes to the registry can affect system stability. Here’s a basic guide:
1. **Open Registry Editor**: Press `Win + R`, type `regedit`, and hit `Enter`.
2. **Navigate to Key**: Go to `HKEY_CURRENT_USER\Software\Microsoft\Windows\CurrentVersion\Policies\Explorer`. If you don’t see `Explorer`, you may need to create it.
3. **Create New Value**: Right-click in the right pane, select `New` > `DWORD (32-bit) Value`. Name it `NoDrives`.
4. **Set Value**: Double-click `NoDrives` and set its value data to hide specific drives. The values are hexadecimal representations of the drives. For example, if you want to hide drive D, you would enter a value that corresponds to D. Consult a hexadecimal drive value table for specific entries.
5. **Restart the Computer**: For the changes to take effect, you’ll need to restart your computer.
Using third-party software is another option for managing drive access. Several programs offer advanced features for drive management and security. Tools like Disk Management software or security suites can provide additional functionalities beyond the built-in Windows tools, such as encryption or detailed audit logs.
In summary, restricting access to drives in Windows 11 involves a variety of methods, each with its strengths and use cases. Whether you choose to hide drives through Disk Management, set permissions via File Explorer, apply policies through Group Policy Editor, or modify the registry, it’s crucial to understand the implications of each method. Always ensure that you back up important data before making significant changes to your system’s configuration. By carefully selecting and applying these methods, you can effectively manage and secure access to your drives, tailored to your specific needs and environment.
