I remember the day I first encountered the issue of needing to run a program as an administrator on my Windows XP machine. It was a regular afternoon, and I was busy working on a project that required a specific application to make system-level changes. I had followed all the usual steps for launching the program, but instead of the smooth operation I expected, I was greeted with an error message stating that administrative privileges were required. Frustration quickly set in as I realized I had never needed to tackle this particular challenge before. I was left with no other option but to figure out how to run the program as an administrator.
I began by researching the problem online, hoping to find a straightforward solution. Windows XP, while an older operating system, still had its quirks and specific methods for handling administrative tasks. The information I found was both sparse and scattered, making it hard to piece together a coherent solution. But through persistent searching, I discovered a few key methods that ultimately resolved my issue.
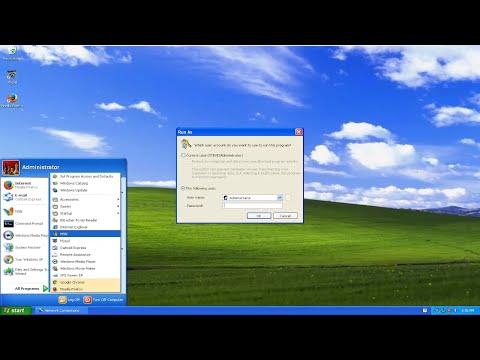
The first method I explored involved using the built-in “Run As” command. This option is a versatile tool in Windows XP that allows users to execute programs with different user permissions. Here’s how I did it:
- I clicked on the “Start” menu, which brought up a list of all my installed programs and system tools.
- From there, I selected “Run,” which opened the Run dialog box.
- In the Run dialog box, I typed in the command for the application I needed to run, followed by a space and the keyword “runas” with the appropriate parameters. For example, if I wanted to run a program named “example.exe,” I would type
runas /user:Administrator "C:\Path\To\example.exe". - After pressing Enter, I was prompted to enter the password for the Administrator account. Once the correct password was provided, the program launched with administrative privileges.
This method was effective, but I found it somewhat cumbersome, especially if I needed to run programs as an administrator frequently. To streamline the process, I looked into creating a shortcut that would always run the program with administrative rights. This approach required a few additional steps:
- I right-clicked on the desktop and selected “New” > “Shortcut.”
- In the shortcut creation dialog, I entered the path to the program executable along with the
runascommand. For example:runas /user:Administrator "C:\Path\To\example.exe". - I clicked “Next,” named the shortcut something descriptive, and then clicked “Finish.”
- To make this shortcut more convenient, I right-clicked on it and selected “Properties.” In the Properties window, I went to the “Shortcut” tab and clicked on the “Advanced” button.
- I checked the box labeled “Run as administrator” and then clicked “OK” to save the changes.
With this shortcut in place, I could simply double-click it whenever I needed to run the program with elevated permissions, bypassing the need to manually enter commands each time.
As I continued to delve into different solutions, I also discovered another method involving the use of third-party utilities designed to manage administrative privileges more efficiently. One such tool was called “RunAsTool.” It provided a user-friendly interface for setting up and managing program executions with administrative rights. Here’s how I used it:
- I downloaded and installed RunAsTool from a reputable source.
- After installation, I launched the application and was greeted with a simple interface that allowed me to specify the program I wanted to run with administrative privileges.
- I entered the path to the program executable and configured the necessary options to run it as an administrator.
- With just a few clicks, I saved these settings and created a shortcut to launch the program with the required privileges.
This utility simplified the process considerably, especially for someone who was not very tech-savvy. It provided a straightforward way to handle administrative tasks without needing to remember specific commands or credentials each time.
Despite these solutions, I continued to explore other methods and found that creating a batch file was another effective approach. A batch file allowed me to automate the process of running a program with administrative rights. Here’s how I created one:
- I opened Notepad and typed the necessary
runascommand, similar to how I had done with the shortcut. - I saved the file with a
.batextension, ensuring it was saved as “All Files” rather than a text file. - When I ran the batch file, it executed the command with administrative privileges, allowing me to bypass the manual entry process.
By combining these methods, I found a balance between convenience and functionality. Whether using the “Run As” command, creating shortcuts, utilizing third-party tools, or writing batch files, I was able to overcome the challenge of running programs with administrative rights on my Windows XP machine. Each method had its own set of advantages and could be used depending on the specific requirements of the task at hand.
Ultimately, the key to solving this issue was persistence and a willingness to explore various solutions until I found the ones that worked best for my needs. Through a combination of these approaches, I was able to manage my programs effectively and ensure that I had the administrative privileges required to perform critical tasks.