I found myself in a frustrating situation the other day, struggling with saving a Microsoft Excel workbook as a new file on my desktop. The problem wasn’t just about saving; it was about making sure the file was saved correctly so I could access and share it later without any issues. It all began when I was working on a crucial project for work. The spreadsheet contained sensitive financial data that I needed to preserve for future reference. As usual, I had multiple versions of the file saved to ensure I didn’t lose any important changes. But, I was in a rush and needed to save a new version directly onto my desktop quickly.
Here’s how I navigated through the issue step-by-step. First, I made sure my Excel workbook was open and that all the recent changes were saved. Then, I went to the ‘File’ tab on the top-left corner of the Excel window. This tab is crucial for accessing the main options for saving and managing files.
Once I clicked on the ‘File’ tab, a menu appeared with various options. The one I needed was ‘Save As.’ This option allows you to save the current workbook under a new name or in a new location. I clicked on ‘Save As,’ which prompted a submenu to appear, presenting different locations where I could save my file.
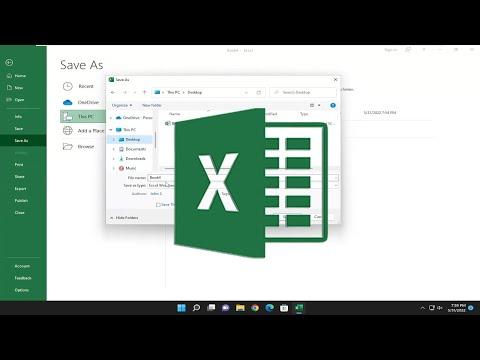
The ‘Save As’ submenu included options like ‘This PC,’ ‘OneDrive,’ and ‘Browse.’ Since I wanted to save the file directly on my desktop, I selected ‘Browse.’ This action opened a ‘Save As’ dialog box where I could navigate through my computer’s directories. In this dialog box, I had to navigate to the desktop directory. On the left side of the dialog box, there was a pane showing various locations, including ‘Desktop.’ I clicked on ‘Desktop’ to open the desktop directory.
With the desktop directory open, I needed to decide on a file name for the new version of my workbook. I typed a new name into the ‘File name’ field at the bottom of the dialog box. It’s important to choose a name that helps you identify the file later. I added a date to the name to keep track of different versions, like ‘Project_Financials_August2024.’
Next, I made sure that the ‘Save as type’ field was set to the desired format. By default, Excel saves files in the .xlsx format, which is suitable for most purposes. However, if you need the file in a different format, such as .xls or .csv, you could select that option from the drop-down menu next to ‘Save as type.’ For my needs, the default .xlsx format was perfect, so I left it as is.
After double-checking the file name and location, I clicked the ‘Save’ button. Excel then saved the workbook as a new file on my desktop. To confirm that everything was saved correctly, I minimized all open windows and checked my desktop. Sure enough, the new file appeared with the name I had chosen. I opened the file to make sure all the data was intact and that the changes were saved correctly.
This process ensured that I had a new version of my workbook saved on my desktop without overwriting the original file. It’s a handy method for keeping track of multiple versions of a file, especially when working on important projects where changes are frequent.
If you’re ever in a situation similar to mine, this method will help you save your Excel workbooks effectively. Just remember to choose a clear and descriptive file name and to check that the correct file format is selected. By following these steps, you’ll avoid confusion and ensure that your files are organized and accessible whenever you need them.
This approach not only helps in keeping track of different versions but also ensures that you have backups readily available if something goes wrong with the original file. It’s a small but crucial step in managing your work efficiently and maintaining the integrity of your important documents.
