I had just started a new job at a tech startup, and my first task was to communicate with several clients via email. The only problem was, I had never used Gmail before. I had always been more comfortable with other email services, so I found myself in a bit of a bind. As I sat down to compose my first email, I realized I needed to figure out how to use Gmail effectively. It seemed like a straightforward task, but I wanted to make sure I did it right.
To begin, I logged into my Gmail account, which was set up by my employer. The interface was clean and modern, but a little different from what I was used to. The first thing I noticed was the inbox, which was neatly organized with categories like Primary, Social, and Promotions. I knew I needed to click on the “Compose” button to start a new email, so I found it in the upper-left corner of the screen. It was a small, colorful button that looked like a pencil.
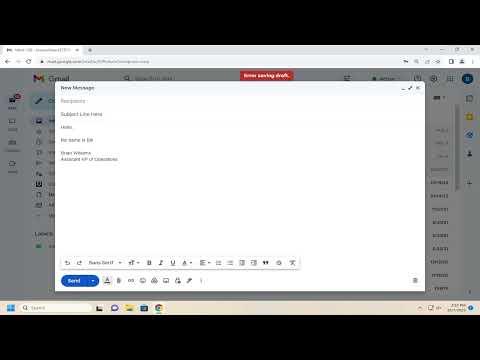
After clicking “Compose,” a new message window appeared on the right side of the screen. I was presented with fields to enter the recipient’s email address, a subject line, and the body of the email. It seemed simple enough, but I wanted to delve deeper into the features to ensure I was using all the options available.
First, I entered the recipient’s email address in the “To” field. I had a list of contacts from the client’s company, so I started typing their email address. Gmail offered suggestions as I typed, which was helpful. I selected the correct email address from the list. Next, I moved on to the “Subject” field. Here, I typed a concise and relevant subject line to ensure the recipient knew what the email was about.
For the body of the email, I crafted a clear and professional message. Gmail provided a variety of formatting options to make the email look polished. I could change the font size, color, and style, add bullet points, and even include hyperlinks. I spent some time formatting the text to make sure it was easy to read and visually appealing.
One feature that caught my attention was the “Insert files using Drive” button, represented by a Google Drive icon. I needed to attach a document to my email, so I clicked on this icon. A window popped up showing my Google Drive files. I selected the file I wanted to attach, and it was linked to the email. Gmail also allowed me to attach files directly from my computer by clicking on the paperclip icon.
Another useful feature was the “Schedule send” option. I wanted to send the email at a specific time rather than immediately. To do this, I clicked the arrow next to the “Send” button and chose “Schedule send.” I selected the date and time I wanted the email to be sent, and Gmail took care of the rest. This feature was perfect for coordinating with clients across different time zones.
As I reviewed my email, I noticed the “More options” button, which provided additional choices like “Add Cc” and “Add Bcc.” These options allowed me to send copies of the email to additional recipients or keep certain recipients’ email addresses hidden from others. I used these features to ensure the right people were included in the email thread without disclosing everyone’s contact details.
Once I was satisfied with the email’s content and formatting, I clicked the “Send” button. A small confirmation message appeared at the bottom of the screen, letting me know that my email had been sent. Gmail also saved a draft of my email automatically, which was reassuring in case I needed to make changes before sending it.
Overall, navigating Gmail for the first time was a smooth experience. The interface was user-friendly, and the features were intuitive once I took the time to explore them. From composing and formatting to scheduling and attaching files, Gmail offered a range of tools to make email communication effective and efficient. My initial concerns about using a new email platform were quickly alleviated as I became familiar with the functionalities and settings. By the end of my first day, I felt confident in using Gmail for all my professional communications.
