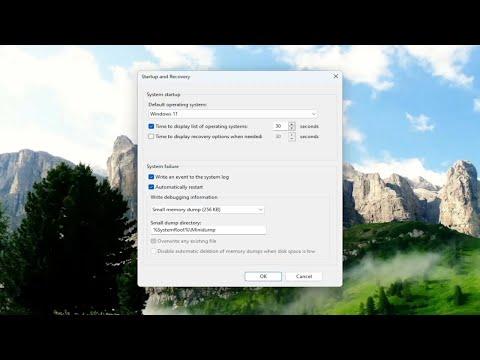
When setting up a multi-boot or dual-boot system with Windows 11 or Windows 10, it’s essential to configure the operating system (OS) selection screen properly. This allows you to choose between different installed operating systems each time you start your computer. Having a well-organized boot menu ensures a smoother and more efficient experience when switching between different OSes.
I recently tackled the task of displaying OS options for a dual-boot setup on my Windows 11 machine, and I want to share the process I followed to make this happen. Here’s a comprehensive guide on how to configure and display OS selection for a multi-boot or dual-boot system in Windows 11/10.
First, I began by ensuring that both operating systems were installed on separate partitions or drives. This is a critical step because the boot menu configuration relies on the OSes being properly installed and recognized by the system. For instance, I had Windows 11 on one partition and an older version of Windows 10 on another. Both installations should be properly set up before proceeding with the configuration.
Next, I booted into Windows 11, which was my primary OS. To access the boot configuration settings, I opened the Command Prompt with administrative privileges. I did this by right-clicking on the Start menu and selecting “Windows Terminal (Admin)” or “Command Prompt (Admin),” depending on what was available. It’s crucial to run the Command Prompt as an administrator to make system-level changes.
Once the Command Prompt was open, I entered the command `bcdedit` to view the current boot configuration data. This command provides a detailed list of boot entries and their associated settings. The output included information about the default boot loader and the various operating systems available on my system.
To ensure that the boot menu displays all available operating systems, I made a few modifications using the `bcdedit` tool. I started by examining the entries in the boot configuration data to ensure that both Windows 11 and Windows 10 were listed. If an OS was missing, it might indicate a problem with the installation or configuration that needed to be addressed first.
The next step involved modifying the boot menu display settings to ensure that the OS selection screen would appear each time the computer started. I used the `bcdedit` command to set the boot menu timeout and to ensure that the boot manager would show the list of operating systems. For this, I executed the command `bcdedit /set {bootmgr} timeout 30`, which set the timeout period for the boot menu to 30 seconds. This means that the OS selection screen would appear for 30 seconds before automatically booting into the default OS. I found that a timeout of 30 seconds provided ample time to choose between the operating systems, but this can be adjusted according to personal preference.
In addition to setting the timeout, I ensured that the boot manager was configured to display a menu that allowed for OS selection. The `bcdedit` tool has options to manage various aspects of the boot configuration, including the display of operating systems. To confirm that the OS selection menu was enabled, I ran the command `bcdedit /set {default} description “Windows 11″`, which provided a descriptive label for the default OS. I repeated similar commands to label the other OS entries.
Another useful tool I discovered during this process was the System Configuration Utility, commonly known as `msconfig`. To access it, I pressed `Win + R` to open the Run dialog, typed `msconfig`, and pressed Enter. In the System Configuration window, I navigated to the “Boot” tab. This tab allowed me to view and configure the boot settings for each installed operating system. From here, I could set the default OS, adjust the timeout period, and even rename the OS entries for clarity.
It’s also worth noting that if the OS selection screen didn’t appear after making these changes, it might be necessary to perform a reboot or check for issues with the boot loader. Sometimes, issues with boot configuration can be resolved by running the `bootrec /fixmbr` and `bootrec /fixboot` commands from the Command Prompt. These commands help to repair the master boot record and boot sector, respectively, which can resolve boot-related problems.
Lastly, to ensure a seamless boot experience, I regularly tested the configuration by rebooting my computer several times to verify that the OS selection screen appeared as expected. I also kept a backup of important data and created a system restore point before making changes to the boot configuration. This precaution helped to safeguard against any potential issues that could arise during the process.
In summary, configuring the OS selection screen for a multi-boot or dual-boot system in Windows 11/10 involves checking the installation of operating systems, using the `bcdedit` command to set display and timeout options, and utilizing tools like `msconfig` for additional configuration. By following these steps, I successfully set up a boot menu that allows for easy selection between Windows 11 and Windows 10, ensuring a smooth and efficient dual-boot experience.
