I remember the day I first encountered the challenge of managing gridlines in Microsoft Word. It was a typical workday, and I was engrossed in creating a complex document that required precise alignment of text and images. Everything seemed to be going well until I noticed that my layout wasn’t as neat as I’d hoped. I had to find a way to control the gridlines in Word to help me better organize the elements on the page.
At first, I wasn’t even sure where to start. The gridlines were essential for my document because they allowed me to see how text boxes and images were aligned relative to one another. However, they were also cluttering the view when I was simply trying to review my content. I needed a method to toggle them on and off depending on my needs. After some searching and experimentation, I finally figured out how to show and hide gridlines in Microsoft Word, and I’d like to share this experience to help anyone who finds themselves in a similar situation.
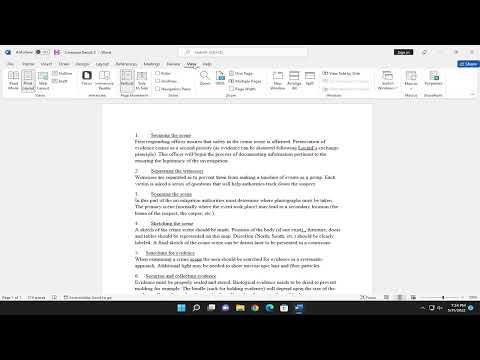
First, I navigated to the “View” tab on the Ribbon. The Ribbon is the horizontal menu bar at the top of the Word window where you can find various tabs such as Home, Insert, and Design. Under the “View” tab, there are different options for adjusting what you see on your screen. It took me a little while to locate the specific setting I needed, but I found that the “Gridlines” option was key to controlling the visibility of the gridlines.
To show the gridlines, I checked the “Gridlines” checkbox in the “Show” group on the View tab. As soon as I selected this option, the gridlines appeared on my document. This made it much easier to align my text boxes and images accurately. I was able to see the faint grid patterns that divided my page into a matrix of cells, which helped ensure that everything was positioned exactly where I wanted it to be.
However, once my layout was complete and I no longer needed the gridlines for alignment purposes, they began to feel more like a distraction. I needed to remove them to get a clearer view of the final appearance of my document. Returning to the same “View” tab, I simply unselected the “Gridlines” checkbox. Instantly, the gridlines vanished, leaving me with a cleaner, more professional-looking document.
This process of toggling gridlines on and off turned out to be incredibly useful. Whenever I needed to fine-tune the alignment of various elements, I would enable the gridlines to help guide my adjustments. Once I was satisfied with the layout, I would turn them off to focus on the overall look and content of my document without the visual interference of the gridlines.
Throughout this experience, I learned that gridlines are a powerful tool in Microsoft Word, particularly for documents that require precise layout and alignment. By using the “View” tab effectively, I was able to manage these gridlines according to my needs, ensuring that they served their purpose without becoming a hindrance.
In addition to managing gridlines, I discovered other features in the “View” tab that complemented my efforts in document layout. For instance, the “Ruler” option, when enabled, provided a horizontal and vertical ruler along the edges of my document, which further aided in aligning objects. The “Navigation Pane” and “Zoom” options also proved useful as I navigated through my document and adjusted the view to get a better sense of how everything looked.
Overall, mastering the gridline feature in Microsoft Word made a significant difference in my document creation process. It allowed me to maintain a high level of precision and organization while also providing the flexibility to remove these guidelines when they were no longer needed. Whether working on a professional report, a complex layout, or a simple document, understanding how to show and hide gridlines can greatly enhance your ability to produce well-organized and visually appealing content.
If you ever find yourself in a similar situation, struggling to manage the visual elements of your document, remember this simple but effective technique. By utilizing the gridline feature in the “View” tab, you can easily control the appearance of your document, making it easier to align elements precisely and ensure a polished final result.
