I recently found myself needing to manage the Windows Media Player Network Sharing Service on my Windows 11 system. It’s a tool that can be quite useful for streaming media over a network, but I didn’t need it active all the time. So, I decided to delve into how to start and stop this service, ensuring it only runs when necessary. Here’s a detailed guide on how to do it.
To start or stop the Windows Media Player Network Sharing Service, you’ll need to access the Services app, which is built into Windows. First, let’s discuss how to stop the service. This is useful if you want to prevent the service from running, perhaps to save system resources or to troubleshoot issues.
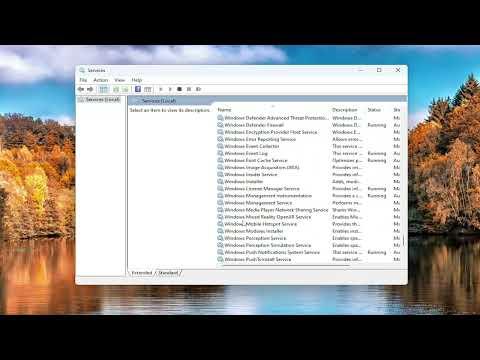
1. **Open the Services App**: Click on the Start button or press the Windows key, then type “Services” and hit Enter. This will open the Services app where you can manage all system services.
2. **Locate the Service**: In the Services window, scroll down to find “Windows Media Player Network Sharing Service”. The list is organized alphabetically, so it shouldn’t be too hard to find.
3. **Stop the Service**: Right-click on the “Windows Media Player Network Sharing Service” entry and select “Stop” from the context menu. The service will stop immediately, and you’ll see its status change to “Stopped”.
Stopping the service can be particularly helpful if you are experiencing issues with network sharing or simply do not require media sharing at the moment. If you later decide you want to restart it, you can follow similar steps but choose “Start” instead of “Stop”.
Now, if you need to start the service, perhaps after having stopped it or to enable it for the first time, follow these steps:
1. **Open the Services App**: As before, open the Services app by typing “Services” in the Start menu search and pressing Enter.
2. **Find the Service**: Scroll through the list and locate “Windows Media Player Network Sharing Service”.
3. **Start the Service**: Right-click on the service and select “Start” from the context menu. The service will begin running, and its status will update to “Running”.
Starting the service is straightforward and ensures that media sharing features are available when you need them. This is often the ultimate goal when managing services—having them active only when they are necessary.
If you want to delve deeper, you can configure the service to start automatically when Windows boots up. Here’s how to set that up:
1. **Open the Services App**: Go to the Start menu, type “Services”, and hit Enter.
2. **Access Service Properties**: Right-click on “Windows Media Player Network Sharing Service” and select “Properties”.
3. **Change Startup Type**: In the Properties window, you’ll see a drop-down menu next to “Startup type”. You can choose from “Automatic”, “Manual”, or “Disabled”. For automatic startup, select “Automatic”.
4. **Apply and OK**: Click “Apply” and then “OK” to save your changes.
With this configuration, Windows will automatically start the service every time your system boots up, ensuring that your media sharing capabilities are always ready when you need them.
Conversely, if you prefer to ensure the service never starts without your intervention, you can set the startup type to “Disabled”. This will prevent the service from running even if you manually try to start it unless you first change the startup type back to “Manual” or “Automatic”.
Managing the Windows Media Player Network Sharing Service can greatly affect how you interact with media across your network. Whether you’re troubleshooting, conserving resources, or simply adjusting settings for your convenience, knowing how to start and stop this service is crucial.
In summary, by using the Services app, you can easily start or stop the Windows Media Player Network Sharing Service according to your needs. Whether you’re temporarily disabling it or setting it to run at startup, these steps will help you control the service effectively. This flexibility ensures that you maintain optimal system performance and media sharing functionality tailored to your requirements.
