I remember the day I first faced the challenge of managing background processes on my Windows 10 PC. It all started when I noticed my computer slowing down significantly, despite not running any intensive applications. The issue became even more apparent when I checked the Task Manager and saw a myriad of background processes consuming precious system resources. It was clear that something needed to be done to regain control over my computer’s performance.
Initially, I felt overwhelmed by the number of processes running simultaneously, and it seemed like a daunting task to identify which ones were necessary and which were just draining resources. However, I decided to tackle the problem methodically to improve my system’s efficiency and performance.
The first step I took was to familiarize myself with how to access the Task Manager, which is the primary tool for monitoring and managing processes on Windows 10 and 11. To open it, I pressed Ctrl + Shift + Esc, which brought up the Task Manager directly. Alternatively, I could have right-clicked on the taskbar and selected “Task Manager” from the context menu. Once I had the Task Manager open, I navigated to the “Processes” tab, where I could see a list of all the running processes and their impact on system resources.
One of the first things I did was identify processes that were consuming an unusually high amount of CPU, memory, or disk usage. I sorted the list by clicking on the respective column headers, which made it easier to pinpoint which processes were hogging resources. I then researched each process to understand its purpose and whether it was essential for my daily activities. Some processes were clearly related to system operations and were necessary, while others seemed to be associated with applications or services I wasn’t actively using.
For the processes that I determined were non-essential, I considered stopping them. To do this, I selected the process and clicked on “End Task” at the bottom right corner of the Task Manager window. This action would terminate the process, but I knew it was only a temporary solution. Many processes would restart automatically, either because they were set to run at startup or because they were required for system stability.
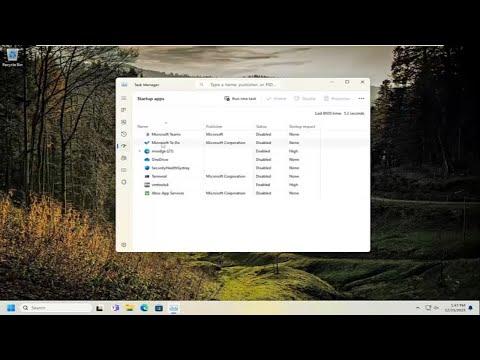
To address this more permanently, I explored the “Startup” tab in Task Manager. This tab displayed a list of applications that were set to start automatically when Windows booted up. I reviewed the list and disabled any applications that I didn’t need immediately. I did this by selecting the application and clicking “Disable” in the bottom right corner. Disabling unnecessary startup programs significantly improved my system’s boot time and overall performance.
Next, I delved into the “Services” tab in Task Manager. Services are background processes that support various functions in Windows and other applications. Some of these services were critical for the operating system to function properly, while others were related to third-party applications. I right-clicked on services that I suspected were non-essential and chose “Open Services” from the context menu. This took me to the Services management console, where I could see a more detailed list of services, their descriptions, and their statuses.
In the Services management console, I carefully evaluated which services were set to start automatically. I researched each service to determine whether it was necessary. For services that I found to be non-essential, I changed their startup type to “Manual” or “Disabled,” depending on how often I used the associated application or feature. Changing the startup type of a service meant it wouldn’t consume resources during boot-up but could be started manually if needed.
Additionally, I used the System Configuration tool, commonly known as “msconfig,” to further manage startup processes. To access this tool, I pressed Win + R to open the Run dialog, typed “msconfig,” and pressed Enter. In the System Configuration window, I navigated to the “Startup” tab, which provided a list of startup items. By clicking “Open Task Manager” from this tab, I could directly manage startup applications as I had previously done.
One crucial aspect I discovered was managing scheduled tasks. Windows has a Task Scheduler that allows applications and services to run at predefined times or events. To access Task Scheduler, I typed “Task Scheduler” into the Start menu search bar and opened the application. In the Task Scheduler window, I reviewed the scheduled tasks to ensure none were unnecessarily consuming resources or running at inappropriate times. I disabled or deleted tasks that weren’t essential, which helped in freeing up system resources.
Another significant improvement came from checking for and managing background applications. In Windows 10 and 11, background apps can run even when they’re not actively being used. To manage these, I went to Settings > Privacy > Background apps. Here, I could see a list of apps that were allowed to run in the background. I turned off the toggle switches for apps that I didn’t need running at all times, which helped in reducing the load on my system.
Finally, I made sure to regularly perform system maintenance tasks such as checking for updates and running antivirus scans. Keeping Windows and installed software up to date ensured that any known performance issues or security vulnerabilities were addressed. Running antivirus scans helped in identifying and removing any potential malware that could be contributing to background process issues.
In conclusion, by methodically reviewing and managing background processes, startup programs, services, scheduled tasks, and background apps, I was able to significantly improve my computer’s performance. The process required a bit of research and cautious adjustments, but the end result was a smoother and more efficient system. If you find yourself facing similar performance issues, I recommend taking these steps to regain control over your system and enhance its overall responsiveness.
