Last week, I encountered an issue that I hadn’t anticipated but quickly became a pressing concern. I was working on a project at home, organizing files and folders, and somehow ended up sharing a folder on my Windows 10 system that I didn’t intend to. It was a folder containing sensitive information related to my freelance work, and I realized it was accessible to anyone on my network. As a result, I needed to figure out how to stop sharing it promptly.
I remember feeling a bit panicked as I recognized the potential risks associated with having such sensitive data exposed. My first instinct was to quickly disconnect from the network, but I knew I needed a more permanent solution. So, I took a deep breath and started researching how to stop sharing the folder in Windows 10. The steps were fairly straightforward, but it was important to follow them correctly to ensure that the folder was no longer accessible.
I began by navigating to the folder that I had accidentally shared. Right-clicking on it, I selected ‘Properties’ from the context menu. This opened a new window with various tabs at the top, including ‘General,’ ‘Security,’ and ‘Sharing.’ I clicked on the ‘Sharing’ tab to continue. In this tab, I saw an option labeled ‘Advanced Sharing,’ which was where I needed to go to make changes to the sharing settings.
Upon clicking ‘Advanced Sharing,’ a new window popped up, presenting me with several options. I noticed a checkbox labeled ‘Share this folder,’ which was currently selected. Since my goal was to stop sharing the folder, I unchecked this box. As soon as I did, I saw that the ‘Share this folder’ option was no longer selected, indicating that the folder would no longer be shared with other users on the network.
To ensure that the changes were applied correctly, I clicked ‘Apply’ and then ‘OK’ to close the Advanced Sharing window. I was relieved to see that the folder was no longer listed as shared. However, I wanted to double-check to make sure that no remnants of the previous sharing settings remained. I returned to the main ‘Sharing’ tab and noticed that the folder was now marked as ‘Not Shared.’ This was exactly what I wanted to see.
I then took a few more steps to verify that the folder was secure. I went back to the ‘Properties’ window and switched to the ‘Security’ tab. Here, I made sure that only authorized users had permissions to access the folder. I reviewed the list of users and groups with access rights and adjusted them as needed to ensure that only my account had permissions to the folder.
Additionally, I checked my network settings to make sure there were no other potential vulnerabilities. I opened the ‘Control Panel’ and navigated to ‘Network and Sharing Center,’ where I reviewed the settings related to network discovery and file sharing. I confirmed that file sharing was turned off for all networks except the one I was currently using. This added an extra layer of security, ensuring that my folder wasn’t inadvertently shared on a public network.
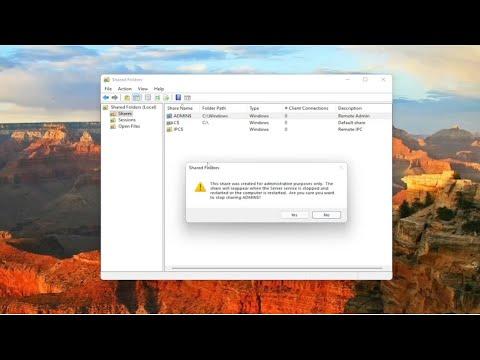
To make sure I had followed all the necessary steps correctly, I also searched online for any additional precautions I might need to take. I found a helpful guide that suggested checking for any remaining shared permissions through the ‘Computer Management’ tool. Following this guide, I accessed ‘Computer Management’ from the ‘Control Panel,’ navigated to ‘Shared Folders,’ and reviewed the list of shared folders. I confirmed that the problematic folder was no longer listed.
With the folder now secure and my network settings adjusted, I felt a sense of relief. The entire process had taken a bit of time and attention to detail, but it was worth it to ensure that my sensitive information was protected. I made a mental note to be more cautious with sharing settings in the future, especially when dealing with important or private files.
In retrospect, this experience taught me a valuable lesson about the importance of regularly reviewing and managing file sharing settings. It’s easy to overlook these details when focused on other tasks, but taking the time to ensure that sensitive data is properly secured is crucial. By following the steps I detailed above, I was able to resolve the issue efficiently and avoid potential security risks.
