Switching from a Microsoft account to a local account on Windows 11 is a straightforward process that can be completed in just a few steps. Here’s a detailed guide on how to make the switch.
First, ensure that you’re logged into your Windows 11 system with the Microsoft account you wish to switch from. It’s important to note that you should have administrative rights on the computer to perform this action. If you’re not an administrator, you will need to log in with an account that has these privileges or get the necessary permissions from someone who does.
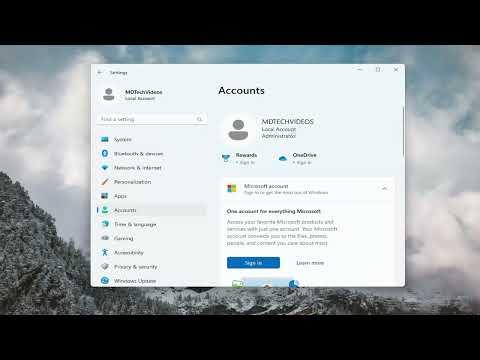
To start, click on the Start menu and select the Settings app, which can be found as a gear icon. Alternatively, you can press `Win + I` to open the Settings directly. In the Settings window, navigate to the “Accounts” section. This section contains various options related to user accounts and sign-in methods.
Once you’re in the Accounts section, look for the “Your info” tab. Here, you will see your current account details, including the email address associated with your Microsoft account. To proceed with switching to a local account, you’ll need to select the option labeled “Sign in with a local account instead.” This option will prompt a confirmation window asking if you really want to switch to a local account. Confirm your choice to continue with the process.
You will be asked to verify your identity. Enter your Microsoft account password to proceed. This step ensures that you are authorized to make changes to the account settings. After verification, you’ll be directed to the screen where you can create your local account credentials.
Here, you will need to provide a username for your local account. This can be any name you choose but should be something you can easily remember. Next, set a password for your local account. It’s recommended to use a strong password to maintain security. You’ll also need to confirm the password by entering it again. If you prefer, you can add a password hint to help you remember it if you forget. Once you’ve filled out all the necessary fields, click “Next.”
At this point, Windows 11 will create your local account, and you will see a confirmation message indicating that the account has been successfully set up. You will now need to sign out of your Microsoft account. To do this, click on the Start menu again, select your profile icon, and choose “Sign out.”
After signing out, you’ll be prompted to sign in again. Use the credentials for your newly created local account to log in. Your desktop and personal files will remain intact during this process, so you won’t lose any data. However, keep in mind that switching to a local account means you won’t have access to certain features tied to your Microsoft account, such as OneDrive or Microsoft Store purchases.
It’s a good idea to review your system settings and adjust any preferences that may have changed after the switch. For instance, if you had certain synchronization settings with your Microsoft account, you might need to reconfigure these settings manually. Additionally, check for any applications that were tied to your Microsoft account and see if you need to log in to them separately.
In summary, switching from a Microsoft account to a local account on Windows 11 involves accessing the Settings app, navigating to the Accounts section, choosing the option to sign in with a local account instead, verifying your identity, and creating new local account credentials. This process is fairly simple and can be completed without major disruptions to your workflow. Just remember to review your settings and adjust as needed to ensure a smooth transition.
