I remember the day vividly when I first stumbled upon the issue of GPU scheduling on my Windows 11 system. I was knee-deep in a complex video editing project, pushing my computer’s limits to render high-definition footage. Everything seemed to be going smoothly until, suddenly, my system started to lag and stutter in ways I hadn’t experienced before. This wasn’t just a minor hiccup; it was affecting my workflow significantly. Frustration set in as I tried to understand what was causing these performance drops. After some research and troubleshooting, I discovered that the problem might be related to GPU scheduling settings in Windows 11.
In my quest to resolve this issue, I learned about “Accelerated GPU Scheduling.” This feature, introduced with Windows 10 and carried over to Windows 11, is designed to reduce latency and improve the efficiency of GPU memory management. Essentially, it shifts some of the workload from the CPU to the GPU, aiming to enhance overall performance. However, this feature doesn’t always work seamlessly with every system configuration or application, which might have been causing the lag I experienced.
To address this, I decided to delve deeper into how to turn Accelerated GPU Scheduling on or off in Windows 11. The process was straightforward, but I needed to ensure I followed the steps correctly to either enable or disable the feature, depending on what was best for my situation.
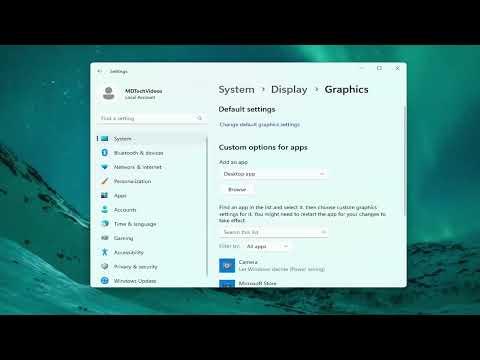
First, I accessed the Windows Settings by pressing the Windows key and the “I” key simultaneously. From there, I navigated to the “System” section, where I found the “Display” settings. Within the Display settings, I scrolled down and clicked on “Graphics settings.” This section was where I would manage the GPU scheduling settings.
In the Graphics settings menu, I saw an option labeled “Hardware-accelerated GPU scheduling.” To check whether it was currently enabled or disabled, I simply looked at the toggle switch next to this option. If the switch was on, the feature was enabled; if it was off, the feature was disabled.
In my case, since the performance issues were persisting, I decided to experiment by toggling the switch to see if it made a difference. I turned off the Hardware-accelerated GPU scheduling feature, rebooted my computer, and then returned to my video editing work. The lag and stuttering I had experienced seemed to reduce significantly. This suggested that in my particular configuration, having the feature turned off provided a more stable performance.
However, I didn’t stop there. To ensure that the solution was effective and that there wasn’t another underlying issue, I also explored some additional settings and updates. I checked for any available Windows updates that might address compatibility issues or performance enhancements. Sometimes, performance problems can be linked to outdated system drivers or OS updates.
I also went into the Device Manager, which I accessed by right-clicking the Start button and selecting “Device Manager.” Here, I expanded the “Display adapters” section and right-clicked on my GPU to select “Update driver.” Keeping drivers up to date can resolve many performance-related problems.
After updating the drivers, I rebooted the system once more and tested various applications to ensure everything was running smoothly. The combination of turning off Hardware-accelerated GPU scheduling and updating my drivers seemed to have restored stability to my video editing tasks.
For those who might face similar issues, it’s essential to note that the optimal settings can vary based on the specific hardware and software configuration of your system. What worked for me might not be the ultimate solution for everyone. It’s always a good practice to experiment with different settings and monitor performance closely to find the best configuration for your needs.
In summary, navigating GPU scheduling settings in Windows 11 is a matter of understanding your system’s performance and tweaking settings accordingly. By turning off the Accelerated GPU Scheduling feature and ensuring that all drivers and system updates are current, I was able to resolve the performance issues that had been troubling me. If you find yourself in a similar situation, I recommend following these steps and adjusting based on your results.