I recently found myself in a situation where I needed to unblock an email address in Gmail. It all started when I noticed that I had stopped receiving emails from someone important. After some investigation, I realized that their email address had been accidentally added to my blocked list. This meant I wasn’t getting their messages, and they were being directed straight to my spam folder. Since I didn’t want to miss out on any of their emails, I knew I had to figure out how to unblock the address. It seemed like a straightforward task, but I quickly learned that there were a few steps involved.
To start with, I logged into my Gmail account from my computer. Although you can manage your blocked addresses from mobile devices, I found that doing this on a computer provided a clearer view of the settings and made the process easier to follow. Once I was in my Gmail inbox, I needed to locate the settings gear icon, which is usually situated in the upper right corner of the page. Clicking on this icon opened a dropdown menu, from which I selected “See all settings” to get to the full settings page.
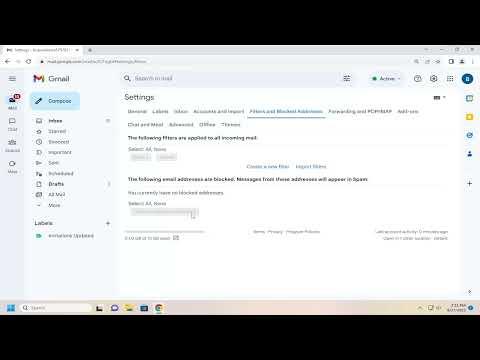
On the settings page, I went to the “Filters and Blocked Addresses” tab. This section is where Gmail allows you to manage various filters, including those that block specific email addresses. Here, I found a list of all the email addresses I had blocked. The list was quite helpful because it showed the exact email addresses that were prevented from sending messages to my inbox. Scanning through this list, I found the email address that I needed to unblock.
Once I located the blocked email address, I clicked on the checkbox next to it. This action selected the address and enabled the options to manage it. I then clicked on the “Unblock selected addresses” button. A confirmation prompt appeared, asking if I was sure I wanted to unblock the address. I confirmed my choice by clicking on the “Unblock” button in the prompt. This step was crucial as it ensured that I really intended to unblock the address and avoid any accidental unblocking.
After unblocking the email address, I had to make sure that it would no longer be directed to the spam folder. To do this, I checked my spam folder to ensure that no further emails from that address were being sent there. I did this by navigating to the Spam folder, which is found in the list of labels on the left side of the Gmail interface. Here, I looked for any emails from the recently unblocked address. If I found any, I selected them and used the “Not Spam” option to mark them as legitimate emails. This action helped to ensure that future emails from the address would go directly to my inbox rather than being filtered into spam.
Additionally, I made sure to adjust any existing filters that might have been set up to automatically direct emails from that address to spam. I returned to the “Filters and Blocked Addresses” tab in the settings to review my filters. If there were any filters set up to handle emails from the blocked address, I edited or deleted them as necessary. This step was important to prevent any future emails from being misdirected.
To further confirm that the unblocking was successful, I sent a test email to the address that had been unblocked. This test email was a simple message that I sent to check whether the email would appear in my inbox. This helped me verify that everything was functioning as expected and that emails from that address would no longer be blocked or filtered incorrectly.
In conclusion, unblocking an email address in Gmail is a relatively straightforward process once you know where to look. By following these steps—accessing the settings, managing blocked addresses, and adjusting filters—I was able to resolve the issue and ensure that I received emails from the important contact that had been accidentally blocked. This experience reminded me of the importance of periodically reviewing my email settings and filters to avoid missing out on important communications.
