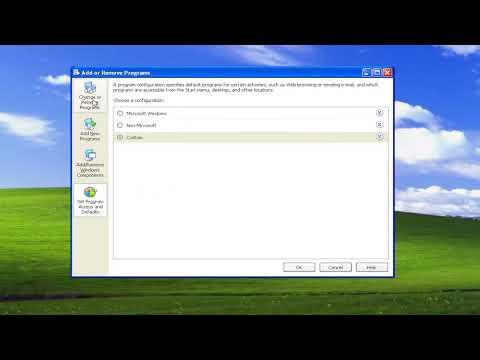
When it comes to managing software on Windows XP, knowing how to uninstall applications properly is essential to maintain a smooth and clutter-free system. Windows XP, despite being an older operating system, offers a straightforward method for removing programs. I’ve had my share of dealing with software installations and removals, and I’ll guide you through the steps I follow to uninstall any application on Windows XP.First and foremost, I start by accessing the Control Panel. This is where most of the administrative tasks, including software removal, are centralized. To open the Control Panel, I click on the “Start” button, which is located at the bottom-left corner of the screen. From the Start menu, I select “Control Panel.” This action opens up a window that provides various system settings and tools.Once I’m in the Control Panel, I look for the “Add or Remove Programs” icon. This icon is usually situated in the first row of icons within the Control Panel window. Clicking on “Add or Remove Programs” opens a new window that lists all the applications currently installed on my system.In the “Add or Remove Programs” window, I find the application I want to uninstall. The list is usually alphabetical, making it easier for me to locate the specific software. If the list is long and I have trouble finding the application, I can use the search function provided within the window. To do this, I type the name of the application into the search box at the top of the list.Once I locate the application, I select it by clicking on it. This action highlights the application and enables the “Remove” button, which is located on the right side of the window. I then click on “Remove” to initiate the uninstallation process. A confirmation dialog typically appears, asking if I am sure I want to remove the selected application. I confirm my choice by clicking “Yes.”After confirming, the uninstallation process begins. The duration of this process can vary depending on the size and complexity of the application. During this time, I might be presented with additional prompts or options related to the uninstallation. For instance, some programs ask if I want to keep or delete user data associated with the application. I make my choices based on whether I might need any data from the application in the future.In some cases, the uninstallation process might require a reboot of the computer to complete. If this is the case, I follow the prompt to restart my computer. After the reboot, I check to ensure that the application has been removed by revisiting the “Add or Remove Programs” window.While most software can be uninstalled through the “Add or Remove Programs” feature, there are instances where an application doesn’t appear in the list. In such cases, I use an alternative method to remove the application. This method involves manually deleting the program’s files and registry entries.To manually remove a program, I first navigate to the directory where the application is installed. Typically, this directory is located within the “Program Files” folder on my C: drive. I access the “Program Files” folder by double-clicking on the “My Computer” icon on the desktop, then opening the C: drive, and finally selecting the “Program Files” folder. Inside, I locate the folder corresponding to the application I want to remove. I right-click on the folder and select “Delete” to remove it.Next, I need to clean up any leftover registry entries associated with the application. To do this, I open the Registry Editor. I do this by clicking on the “Start” button, selecting “Run,” and typing “regedit” into the Run dialog box. After pressing Enter, the Registry Editor opens. I navigate through the registry by expanding the folders in the left pane to find entries related to the application.Navigating the registry can be tricky, so I proceed with caution. I look under the “HKEY_LOCAL_MACHINE” and “HKEY_CURRENT_USER” folders for entries related to the application. Once found, I delete the relevant keys and values associated with the program. This step is crucial because leftover registry entries can sometimes cause issues with system performance or interfere with the installation of other applications.After removing the application’s files and cleaning up the registry, I reboot the computer to ensure all changes take effect and to verify that the application has been fully removed from the system.For those times when even manual removal doesn’t seem to work, or if an application has left behind persistent files and settings, I use third-party uninstaller tools. These tools are designed to scan for and remove all traces of unwanted software, including leftover files and registry entries. They often provide a more thorough removal process and can save time and effort when dealing with stubborn applications.In conclusion, uninstalling applications on Windows XP involves a few straightforward steps that I’ve found effective over time. By using the “Add or Remove Programs” feature, manually deleting files and registry entries, or employing third-party tools, I can manage and clean up my system efficiently. Although Windows XP is an older operating system, these methods are reliable and ensure that unwanted software is properly removed, maintaining the performance and stability of my computer.
How to Uninstall Any Application in Windows XP [Tutorial]
