I remember the day I first encountered the issue of font size and text visibility on my Windows 11 computer as if it were yesterday. It was a regular morning, and I was sitting at my desk, preparing to dive into my usual work tasks. As I squinted at the screen, trying to decipher the tiny text in my documents and emails, I realized how much I was straining my eyes. My vision seemed to be getting worse, or perhaps it was just the small font sizes on my computer that were making everything so hard to read. Either way, I knew something needed to change.
Initially, I tried the simple solutions like adjusting the zoom levels on individual documents or webpages, but these quick fixes were far from ideal. I wanted a more permanent and universal solution that would make reading and navigating my entire operating system more comfortable. After some digging around, I discovered that Windows 11 offers several methods to increase font size and make text larger across the system. With a sense of determination, I set out to solve this issue once and for all.
The first step I took was to explore the built-in accessibility features of Windows 11. To do this, I accessed the Settings menu by clicking on the Start button and selecting the gear icon, which brought me to the Settings app. From there, I navigated to the “Accessibility” section, which seemed like the perfect place to find options related to font and text size.
In the Accessibility settings, I found a section labeled “Text size.” This feature allows you to adjust the text size across the entire operating system, and I was eager to test it out. I used the slider provided to increase the text size incrementally. As I moved the slider to the right, I could see a live preview of how the text would appear in different parts of the system. It was incredibly satisfying to watch the text grow larger and more readable in real-time.
Once I was happy with the text size adjustment, I clicked “Apply” to save the changes. The effect was immediate and noticeable. The text in my system menus, notifications, and various applications became much easier to read. This adjustment made a significant difference in my daily workflow, as I no longer had to squint or lean in towards the screen to read small text.
However, while increasing the text size in Windows 11 did make a substantial improvement, I found that it didn’t always apply uniformly across all applications. Some third-party applications still displayed text at their default sizes, which meant I had to take additional steps to address this inconsistency.
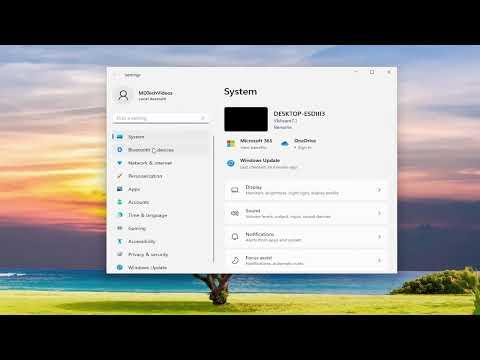
To tackle this issue, I explored another useful feature in Windows 11 called “Scaling.” This feature allows you to adjust the size of text, apps, and other items in the display settings. To access this, I went back to the Settings app, but this time I navigated to the “System” section and selected “Display.” Here, I found the “Scale & layout” settings.
Under the “Scale & layout” section, there was a dropdown menu labeled “Scale.” This menu offered several options, ranging from 100% to 200%. By selecting a higher percentage, I could increase the size of text and other interface elements across all applications and system interfaces. I chose 125% to start with, as it seemed like a balanced adjustment that would make things more readable without making everything excessively large.
After applying the scaling changes, I noticed a considerable improvement in the overall readability of text across various applications. Menus, buttons, and other interface elements became easier to interact with, which significantly reduced the strain on my eyes. It was gratifying to see that the scaling adjustment worked consistently across both built-in and third-party applications.
Despite these improvements, I encountered another challenge related to specific applications that didn’t fully support the new scaling settings. For these cases, I had to use a feature called “Compatibility Settings” to adjust the text size for individual applications. To do this, I right-clicked on the shortcut icon for the application, selected “Properties,” and then navigated to the “Compatibility” tab. Here, I clicked on the “Change high DPI settings” button and checked the box for “Override high DPI scaling behavior.” I then selected “System” from the dropdown menu. This allowed me to force the application to use the system DPI settings, which often resulted in better text scaling.
With these combined adjustments—increasing text size through accessibility settings, adjusting display scaling, and fine-tuning compatibility settings for specific applications—I was able to create a more comfortable and readable environment on my Windows 11 computer. The improvements I made not only enhanced my daily work experience but also contributed to reducing eye strain and improving my overall productivity.
In retrospect, dealing with the issue of small text and font sizes on Windows 11 was a multi-step process that required a combination of system-wide adjustments and application-specific tweaks. However, the effort was well worth it, as the enhanced readability and reduced eye strain have made a significant difference in my day-to-day computer use. If you’re facing similar challenges, I hope my experience and solutions will help you achieve a more comfortable and visually accessible computing experience.