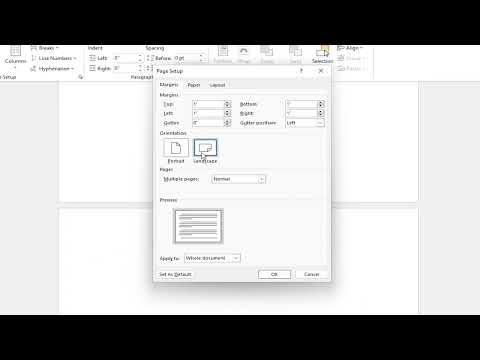
I remember the day when I was working on a complex document in Microsoft Word, trying to combine different types of content in a single file. It was a report with several sections: some needed to be in portrait orientation, while others required landscape to present wide tables and charts more effectively. Initially, I struggled with figuring out how to mix these orientations in one document, but after some experimentation and research, I managed to achieve the desired result. Here’s how I solved the issue and successfully created a document with both portrait and landscape pages.The first step I took was to understand the basics of page orientation in Microsoft Word. By default, Word documents are set to portrait orientation, but landscape orientation can be crucial for specific content types. To get started, I opened the document that I wanted to modify. For this tutorial, let’s assume we have a document with several pages, and we need to switch orientations for particular sections.I began by positioning my cursor at the end of the page before the one I wanted to change to landscape. It’s essential to create a section break here because it allows for changes in formatting, including page orientation, to affect only the section in question. To insert a section break, I went to the “Layout” tab on the Ribbon, clicked on “Breaks,” and selected “Next Page” under the “Section Breaks” category. This action started a new section on the next page, which would allow me to apply different formatting.After creating the section break, I needed to adjust the page orientation for this new section. I clicked on the “Layout” tab again and then selected “Orientation.” From the drop-down menu, I chose “Landscape.” This change applied only to the section where my cursor was currently positioned, leaving the previous sections in portrait orientation.With the landscape section configured, I then needed to continue the document in portrait orientation for subsequent pages. To do this, I placed my cursor at the end of the landscape section, where I wanted to revert to portrait orientation. I repeated the process of inserting a section break by going to “Layout,” clicking on “Breaks,” and selecting “Next Page.” This action created a new section after the landscape pages.Now, with the cursor in the new section, I returned to the “Layout” tab and selected “Orientation” to set it back to “Portrait.” This adjustment ensured that the subsequent pages would be in portrait orientation, just like the beginning of the document.Throughout this process, I learned that section breaks are crucial for managing different formatting options within the same document. They allow you to isolate changes, such as page orientation, to specific parts of the document without affecting the entire file. It’s a powerful feature that can be particularly useful in complex documents that require varied layouts.As I continued working on the document, I occasionally needed to adjust margins or headers and footers to fit the new orientations. Each section in Word can have its own set of headers and footers, which means you can customize these elements for landscape and portrait pages independently. To modify headers or footers, I double-clicked in the header or footer area of the page to open the Header & Footer Tools. Here, I could select options to either link to the previous section or create new headers and footers specific to the current section.One thing I found useful was the “Different First Page” option in the Header & Footer Tools. When dealing with documents that mix page orientations, this feature helps to create unique header and footer layouts for the first page of a section, which can be helpful for adding titles or section-specific information.Finally, after applying all the necessary changes, I reviewed the document to ensure that all sections had the correct orientation and formatting. I checked the page layout in both portrait and landscape sections to confirm that tables, charts, and other content were displayed properly. It’s important to preview the document in Print Layout view to see how it will look when printed or converted to PDF.Combining portrait and landscape pages in a single Microsoft Word document may seem challenging at first, but by understanding and using section breaks effectively, you can achieve a professional and well-organized document. This approach allows for flexibility in presenting different types of content, making your reports, presentations, or any other document more dynamic and visually appealing.Overall, mastering this technique in Word not only improved my document creation skills but also saved me time and effort in ensuring that my reports were presented exactly as needed. Whether you’re working on a detailed business report, an academic paper, or any document requiring varied page layouts, this method will undoubtedly be a valuable tool in your Word processing toolkit.
Microsoft Word: How to Make Portrait & Landscape in Same Document [Tutorial]
