I never imagined that troubleshooting issues with the Windows Installer would become such a significant part of my life, but here I am, sharing my experience and solutions for those who might be facing the same frustrations. It all started one evening when I was in the middle of a critical project. I had been working on a detailed presentation for a big client, and everything seemed to be going smoothly until I decided to install a new software update that I needed urgently.
As I clicked on the installer, I noticed that the process was unusually slow. My excitement quickly turned into concern when the installation halted abruptly and an error message appeared, claiming there was a problem with the Windows Installer. At first, I brushed it off, thinking it was just a minor hiccup. But as I tried to restart the installation, the error persisted, and it became clear that this was not a trivial issue.
Determined to fix the problem, I began by checking online forums and support articles. I quickly discovered that this was a common issue with Windows Installer, especially in Windows 10 and 11. There were numerous suggestions on how to resolve it, but I needed to find a solution that was straightforward and effective.
The first step I took was to ensure that my system was up to date. Windows updates can often resolve underlying issues with system components, including the Windows Installer. I went to the Settings app, navigated to the “Update & Security” section, and clicked on “Check for updates.” To my relief, there were a few pending updates. I installed them and restarted my computer, hoping this would resolve the issue. Unfortunately, the problem persisted.
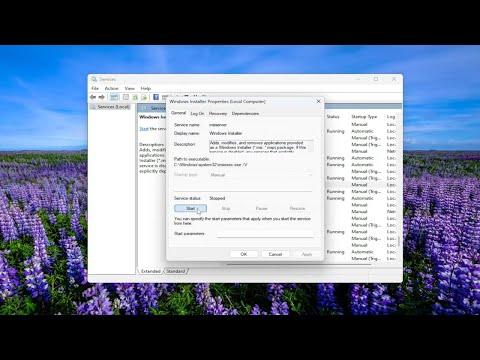
Next, I decided to check if the Windows Installer service was running properly. I opened the Services application by typing “services.msc” in the Start menu search bar. When the Services window opened, I searched for the “Windows Installer” service. It was listed, but its status was “Stopped.” I right-clicked on it and selected “Start” to activate the service. After doing so, I attempted the installation again, but the same error message appeared.
I realized that I needed to delve deeper into the Windows Installer service. I found that sometimes the service might be corrupted or misconfigured, leading to installation issues. To address this, I ran the System File Checker (SFC) tool, which scans and repairs corrupted system files. I opened the Command Prompt as an administrator by right-clicking on the Start menu and selecting “Command Prompt (Admin).” In the Command Prompt window, I typed “sfc /scannow” and pressed Enter. The scan took some time, but it found and fixed several issues. After completing the scan, I restarted my computer and tried the installation again, but the problem was still there.
Determined to get to the root of the issue, I turned to the Deployment Imaging Service and Management Tool (DISM). This tool can fix problems that the SFC tool might not address. I opened the Command Prompt as an administrator once more and typed “DISM /Online /Cleanup-Image /RestoreHealth.” This command checks the health of the system image and repairs any issues it finds. The process took a while, and once it was complete, I restarted my computer again. Despite my efforts, the installation issue remained unresolved.
I then considered the possibility of conflicting software or corrupted installer files. I cleared the temporary files on my system by running the Disk Cleanup tool. I typed “Disk Cleanup” into the Start menu search bar and selected the tool. I chose to clean up system files and deleted all temporary files. Sometimes, leftover files from previous installations can interfere with new ones. After clearing the temp files, I attempted the installation once more, but the problem persisted.
Finally, I decided to perform a repair installation of Windows. This process reinstalls the operating system while keeping your personal files and most settings intact. I downloaded the Windows 10/11 installation media from the Microsoft website and created a bootable USB drive. I ran the setup from the USB drive, selected the “Upgrade” option, and followed the on-screen instructions. This process took a few hours, but once it was complete, I hoped that it would have resolved the issues with the Windows Installer.
After the repair installation, I restarted my computer and tried to install the software again. To my immense relief, the installation went through without any errors. The problem with the Windows Installer was finally resolved. It was a long and frustrating journey, but the persistence paid off. I was able to complete my presentation and meet my deadline, and I learned a lot about troubleshooting Windows Installer issues in the process.
If you’re facing similar issues, my advice is to start with the basics: ensure your system is up to date, check the Windows Installer service, and use tools like SFC and DISM to repair system files. If these steps don’t resolve the problem, clearing temporary files and performing a repair installation might be necessary. Troubleshooting can be a daunting task, but with patience and methodical steps, most issues can be resolved.
