I recently encountered a frustrating issue where Windows Update on my Windows 11 machine stopped checking for updates. I had tried various troubleshooting steps without success, so I decided to dig deeper into the problem to find a solution. Here’s a detailed account of how I resolved the issue.
First, I checked the obvious culprits. I made sure my internet connection was stable because a poor connection can sometimes cause problems with Windows Update. Everything seemed fine on my end, as I could browse the web without any issues. Next, I tried restarting my computer, which is a basic but often effective troubleshooting step. Unfortunately, this did not resolve the issue.
I then proceeded to check the Windows Update service. To do this, I opened the Run dialog by pressing Win + R, typed `services.msc`, and hit Enter. In the Services window, I located the “Windows Update” service and checked its status. It was set to “Running,” which indicated that the service was active. However, I decided to restart the service just in case. I right-clicked on the “Windows Update” service and selected “Restart.” After the restart, I tried checking for updates again, but the issue persisted.
Realizing that the problem might be deeper than just a simple service issue, I decided to delve into the Windows Update Troubleshooter. This tool is built into Windows and is designed to automatically detect and fix issues related to Windows Update. I navigated to Settings by pressing Win + I, then went to “System,” and selected “Troubleshoot.” Under “Other troubleshooters,” I found “Windows Update” and clicked “Run.” The troubleshooter started scanning for problems and attempted to fix them. Despite its efforts, it reported that there were no issues found, which was not very helpful.
Not giving up, I turned my attention to the Windows Update components. Sometimes, corruption or misconfiguration of these components can cause update problems. I decided to reset the Windows Update components manually. To do this, I opened Command Prompt with administrative privileges by searching for “cmd” in the Start menu, right-clicking on Command Prompt, and selecting “Run as administrator.”
In the Command Prompt window, I executed a series of commands to stop the Windows Update services. I typed `net stop wuauserv` and pressed Enter, followed by `net stop cryptSvc` and pressed Enter again. Next, I stopped the Background Intelligent Transfer Service by typing `net stop bits` and pressed Enter. Finally, I stopped the Microsoft Update service with the command `net stop msiserver`.
With these services stopped, I proceeded to rename the software distribution and catroot2 folders. These folders store temporary update files and renaming them forces Windows to create new ones, which can resolve issues related to corrupted files. I entered the following commands to rename the folders:
“`
ren C:\Windows\SoftwareDistribution SoftwareDistribution.old
ren C:\Windows\System32\catroot2 Catroot2.old
“`
After renaming the folders, I restarted the stopped services by typing:
“`
net start wuauserv
net start cryptSvc
net start bits
net start msiserver
“`
I then closed the Command Prompt and attempted to check for updates again. Unfortunately, the problem still persisted, so I decided to try another method.
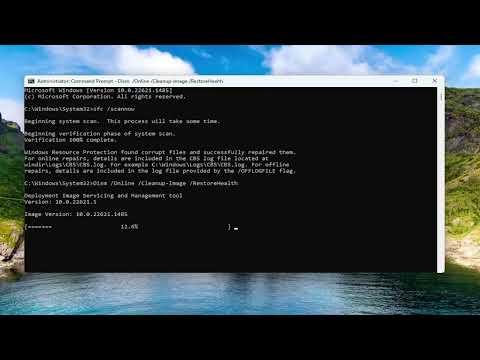
I ran the System File Checker (SFC) to scan for and repair corrupted system files. I opened Command Prompt as an administrator once more and entered the command `sfc /scannow`. This process took some time as it scanned and repaired any corrupted system files it found. Once the scan was complete, I rebooted my computer and checked for updates again. Despite the repairs, the issue continued.
Determined to resolve the issue, I turned to the Deployment Imaging Service and Management Tool (DISM). This tool can fix Windows corruption errors that the SFC tool cannot address. I opened Command Prompt as an administrator and typed `DISM /Online /Cleanup-Image /RestoreHealth`. The DISM tool started to check for and repair any issues with the Windows image. After the process completed, I restarted my computer and once again tried to check for updates. Still, the update check was not functioning as expected.
By now, I had tried several troubleshooting methods, but the issue remained unresolved. I decided to explore a more drastic solution: performing an in-place upgrade repair. This process involves downloading the Windows 11 installation media and running it to repair the existing installation while keeping personal files and applications intact.
I went to the Microsoft website and downloaded the Windows 11 Installation Assistant. After launching the tool, I followed the prompts to upgrade my system. The process took some time, but it successfully completed without any data loss. After the upgrade, I checked for updates once again. To my relief, the Windows Update service started working properly, and I was able to download and install the latest updates.
In summary, resolving the Windows Update issue on my Windows 11 machine involved several steps, including restarting services, using built-in troubleshooters, manually resetting update components, running system file scans, and performing an in-place upgrade repair. Through a combination of these methods, I was finally able to restore the functionality of Windows Update and keep my system up to date.
