I recently found myself in a frustrating situation with my Windows 11 computer. I was working on an important project when suddenly, my internet connection dropped. At first, I thought it might be a temporary glitch, but after a few minutes, it became clear that something more serious was going on. I couldn’t access any websites, and every attempt to connect to the internet was met with a generic error message. The problem persisted despite restarting my router and checking all the cables. I decided to delve into the issue and discovered that my DNS server might be unavailable.
The issue was particularly perplexing because my internet service provider’s status page showed no outages in my area. I knew I had to dig deeper to resolve the problem. I began by checking the network settings on my computer. I noticed that the error message specifically mentioned that the DNS server might be unavailable. For those unfamiliar with DNS, it stands for Domain Name System. It’s essentially the phonebook of the internet, translating human-friendly domain names like “google.com” into IP addresses that computers can understand.
To tackle the problem, I first decided to flush the DNS cache. This is a straightforward process and can sometimes resolve issues with DNS resolution. I opened the Command Prompt as an administrator by right-clicking on the Start button and selecting “Windows Terminal (Admin).” In the terminal window, I typed the command ipconfig /flushdns and pressed Enter. The system responded with a confirmation that the DNS Resolver Cache had been successfully flushed. I hoped this would fix the issue, but unfortunately, the problem persisted.
Next, I checked the DNS server settings in my network adapter configuration. To do this, I navigated to the Network and Sharing Center by right-clicking the network icon in the system tray and selecting “Open Network & Internet settings.” From there, I clicked on “Change adapter options,” which brought me to a list of network connections. I right-clicked on my active network connection and selected “Properties.”
In the list of items, I found “Internet Protocol Version 4 (TCP/IPv4)” and clicked on it, then selected “Properties.” I noticed that the option “Obtain DNS server address automatically” was selected. I decided to manually configure the DNS server settings to see if that would help. I chose “Use the following DNS server addresses” and entered Google’s public DNS servers: 8.8.8.8 for the preferred DNS server and 8.8.4.4 for the alternate DNS server. After applying the changes and closing all the windows, I tried reconnecting to the internet, but the problem was still there.
At this point, I realized that there might be a more complex issue at play, possibly involving my network drivers or system files. I decided to update my network adapter drivers. I went back to the “Device Manager” by right-clicking the Start button and selecting “Device Manager.” In the list of devices, I expanded the “Network adapters” section, right-clicked on my network adapter, and selected “Update driver.”
I chose the option to search automatically for updated driver software. Windows searched for updates and found a newer driver version for my network adapter. I installed the update and restarted my computer. After rebooting, I tested the internet connection again, but the issue persisted. It was clear that I needed to explore other solutions.
I considered the possibility of corrupted system files being the root cause. I decided to run the System File Checker (SFC) tool to scan for and repair any corrupted system files. I opened the Command Prompt as an administrator once more and typed sfc /scannow, then pressed Enter. The tool began scanning my system files and repairing any issues it found. This process took a few minutes, and once it was completed, I restarted my computer. Sadly, the DNS server issue was still not resolved.
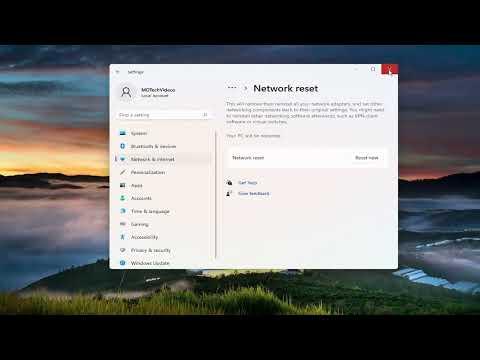
Frustrated but determined, I looked into resetting the network settings on my computer. This can sometimes resolve persistent network issues by resetting all network-related configurations to their default state. I went to “Settings” by pressing Windows + I and navigated to “Network & Internet.” Under “Advanced network settings,” I clicked on “Network reset.” I followed the prompts to reset the network settings and then restarted my computer. I hoped that this would fix the issue, but once again, the problem with the DNS server remained.
Finally, I decided to try a more advanced solution: resetting the TCP/IP stack. This involves using a command in the Command Prompt to reset the internet protocol stack, which can sometimes fix deeper network issues. I opened the Command Prompt as an administrator and typed netsh int ip reset, then pressed Enter. After the command completed, I restarted my computer and checked my internet connection. Miraculously, the DNS server issue was resolved, and I was able to access the internet once again.
In retrospect, it was a combination of steps that ultimately solved the problem. Flushing the DNS cache, manually setting DNS servers, updating network drivers, running the SFC tool, resetting network settings, and resetting the TCP/IP stack all contributed to resolving the issue. Each step was essential in troubleshooting and addressing different aspects of the problem. If anyone encounters a similar issue, I would recommend following these steps systematically, as each step can potentially address different underlying causes of DNS server problems.
